Django REST Framework Authentication Methods
Authentication: Proving Who You Are
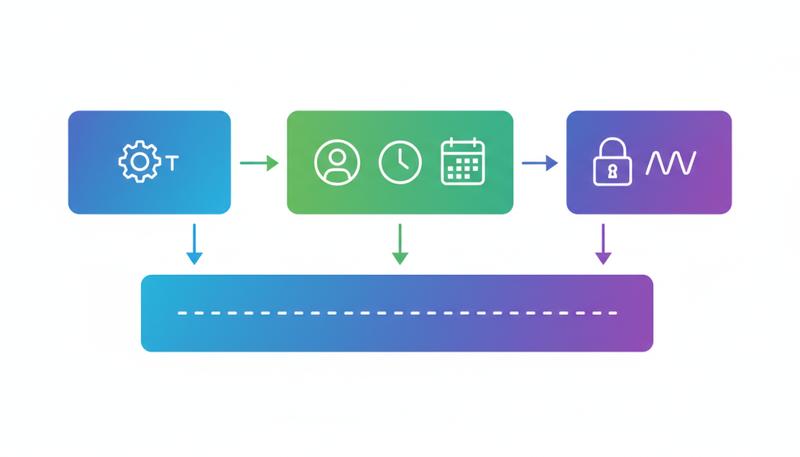
We've now covered how to structure endpoints and choose the right abstraction level — decisions that communicate intent in your code itself. The patterns you've learned apply across all view types, whether you're building a raw APIView or a full ModelViewSet. But choosing the right view level is only half the battle. The other half is knowing who's making the request and what they're allowed to do with it. That's where authentication and permissions enter the picture.
Authentication is one of those topics where the concepts are simple but the implementation details will bite you if you're not paying attention. Before we get into any code, let's establish the mental model that makes everything else make sense. DRF separates two distinct questions that beginners almost always conflate:
- Who are you? (Authentication)
- What are you allowed to do? (Authorization / Permissions)
These sound similar enough that it's tempting to treat them as one problem. They're not. A user can be perfectly authenticated — DRF knows exactly who they are — and still be denied access to a resource. Conversely, some resources are intentionally public: DRF doesn't need to know who you are to let you read them.
from rest_framework.views import APIView
from rest_framework.authentication import BasicAuthentication
from rest_framework.permissions import IsAuthenticated
from rest_framework.response import Response

class InternalToolView(APIView):
    authentication_classes = [BasicAuthentication]
    permission_classes = [IsAuthenticated]

    def get(self, request):
        return Response({'user': request.user.username})
What lives in request.user and request.auth? After authentication runs, request.user is a Django User instance (or AnonymousUser if nothing matched). request.auth holds any additional credential information — for token-based auth, it's the token object or the decoded payload; for session auth, it's None because the session itself is the credential. These two attributes are how the rest of your code interacts with the authentication result.
The 401 vs. 403 Distinction (And Why It Matters)
This trips up almost every developer who first encounters it. HTTP defines two closely related error codes for "you can't do this," and they mean very different things:
- 401 Unauthorized — The request lacks valid authentication credentials. The server is saying: "I don't know who you are. Tell me who you are and try again." It must include a
WWW-Authenticateheader telling the client how to authenticate. - 403 Forbidden — The server understood the request and may or may not know who you are, but you don't have permission regardless. No amount of re-authenticating will help.
The semantic difference matters for API consumers. A 401 means "go get credentials and retry." A 403 means "stop trying, you're not allowed."
DRF implements this distinction based on which authentication scheme is first in your list. If your API is primarily session-authenticated (browser-based), the first authenticator is SessionAuthentication, which doesn't issue 401s — it issues 403s. Why? Because SessionAuthentication can't meaningfully provide a WWW-Authenticate challenge. There's no header the server can send to tell a browser "go log in via the session mechanism." So DRF correctly returns 403 instead.
This surprises developers who expect unauthenticated API requests to always get 401s. If you're building a pure API (no browser sessions), put your token-based authenticator first and you'll get the correct 401 behavior.
Remember: 401 means "authenticate and try again." 403 means "authenticated users without the right permission." When you see 403 where you expected 401, check whether
SessionAuthenticationis first in your list.
BasicAuthentication: Honest About Its Limitations
Basic Authentication is exactly what it sounds like: the client sends username:password encoded in base64 in an Authorization: Basic <credentials> header on every single request.
from rest_framework.authentication import BasicAuthentication
The good parts: it's dead simple, requires no token issuance infrastructure, and works with every HTTP client out of the box.
The bad parts: base64 is not encryption. It's encoding. Anyone who intercepts the request can decode it in milliseconds. This means BasicAuthentication has exactly one appropriate use case in production: behind HTTPS, for internal tools or machine-to-machine API access where you control both ends of the connection and simplicity outweighs the operational overhead of token management.
It also has the property that credentials travel with every request, which means there's no way to "log out" — the credentials remain valid until the user's password changes.
Warning: Never use BasicAuthentication over plain HTTP. The credentials are trivially readable to anyone on the network path. If you deploy this over HTTP accidentally, every request broadcasts the user's password in a form that's one command away from plain text.
For internal Django admin tooling, developer playgrounds, or automated scripts running in trusted internal networks over HTTPS, Basic auth is a perfectly pragmatic choice. For anything facing the public internet, use token-based auth.
SessionAuthentication: The Right Tool for Browser-Based Apps
If you're building a web application where your frontend JavaScript on the same domain calls your DRF API, SessionAuthentication is often the right choice. It works exactly like Django's standard session auth: the user logs in via a form, Django sets a session cookie, and subsequent requests from the browser automatically include that cookie.
from rest_framework.authentication import SessionAuthentication
The significant implication here is CSRF. Because session cookies are sent automatically by the browser, your API endpoints are vulnerable to cross-site request forgery attacks. DRF's SessionAuthentication enforces Django's CSRF protection for all non-safe HTTP methods (POST, PUT, PATCH, DELETE). If you're calling these from JavaScript on the same domain, you need to include the CSRF token in your requests.
For GET requests, CSRF isn't required (they're "safe" methods that shouldn't have side effects). For mutation requests, you'll typically read the csrftoken cookie and pass it as an X-CSRFToken header:
// In your JavaScript frontend
const csrfToken = document.cookie
  .split('; ')
  .find(row => row.startsWith('csrftoken='))
  ?.split('=')[1];

fetch('/api/articles/', {
  method: 'POST',
  headers: {
    'Content-Type': 'application/json',
    'X-CSRFToken': csrfToken,
  },
  body: JSON.stringify({ title: 'New Article' }),
});
SessionAuthentication is a bad fit for mobile clients or third-party service integrations. Those scenarios need stateless token-based auth — sessions don't travel well across origins or mobile app contexts.
TokenAuthentication: Simple but Limited
DRF ships with a built-in TokenAuthentication that stores a database-backed token per user. Setup requires adding rest_framework.authtoken to INSTALLED_APPS, running migrations to create the token table, and generating tokens for users:
# settings.py
INSTALLED_APPS = [
    ...
    'rest_framework.authtoken',
]

REST_FRAMEWORK = {
    'DEFAULT_AUTHENTICATION_CLASSES': [
        'rest_framework.authentication.TokenAuthentication',
    ]
}
# Generate a token for a user (typically in a view or management command)
from rest_framework.authtoken.models import Token

token, created = Token.objects.get_or_create(user=user)
Clients then send the token in every request:
Authorization: Token 9944b09199c62bcf9418ad846dd0e4bbdfc6ee4
This is a meaningful improvement over Basic auth — the user's password isn't transmitted on every request, and tokens can be revoked by deleting the database row.
But DRF's built-in TokenAuthentication has real limitations that show up quickly in production:
- No expiry. Tokens are valid forever until explicitly deleted. A leaked token stays valid indefinitely.
- One token per user. If the same user logs in from their phone and their laptop, they share one token. You can't revoke just one device's access.
- Every request hits the database. The token is looked up in the database on every request. Under load, this becomes a bottleneck.
- No rotation. There's no concept of refreshing or rotating tokens to limit the blast radius of a compromise.
For internal tools, prototypes, or low-traffic APIs, these limitations are often acceptable. For anything production-facing with real users, you'll want JWT.
Tip: If you're already using DRF's
TokenAuthenticationand it's working, don't feel obligated to migrate immediately. The limitations are real but not always disqualifying. Let your actual requirements drive the decision.
JWT Authentication with Simple JWT
JSON Web Tokens (JWT) solve most of the limitations of DRF's built-in token approach. Understanding why requires a quick look at what a JWT actually is.
A JWT is a self-contained token structured as three base64-encoded parts separated by dots: header.payload.signature. The payload contains claims — pieces of information like the user's ID, when the token was issued, and when it expires. The server's signing key creates the signature, which means the server can verify the token's authenticity without a database lookup. The token proves itself.
This stateless verification is the key insight. Instead of "look up this token in the database," the server just verifies the signature cryptographically. Fast, scalable, no database round-trip.
Simple JWT is the production-standard JWT library for DRF. Install it:
pip install djangorestframework-simplejwt
Configure it in settings:
REST_FRAMEWORK = {
    'DEFAULT_AUTHENTICATION_CLASSES': (
        'rest_framework_simplejwt.authentication.JWTAuthentication',
    ),
}
Wire up the token endpoints:
# urls.py
from rest_framework_simplejwt.views import (
    TokenObtainPairView,
    TokenRefreshView,
    TokenVerifyView,
)

urlpatterns = [
    path('api/token/', TokenObtainPairView.as_view(), name='token_obtain_pair'),
    path('api/token/refresh/', TokenRefreshView.as_view(), name='token_refresh'),
    path('api/token/verify/', TokenVerifyView.as_view(), name='token_verify'),
]
That's the core setup. Now let's talk about what these endpoints actually do.
Access Tokens and Refresh Tokens
Simple JWT uses a two-token pattern. This is the crucial design decision that makes JWT practical in production.
Access token: Short-lived (default 5 minutes). This is what the client includes in the Authorization: Bearer <token> header for every API request. Because it expires quickly, a stolen access token has a limited damage window.
Refresh token: Long-lived (default 24 hours, but often set to days or weeks in practice). The client uses this only to get new access tokens when the current one expires. It should be stored more carefully than the access token and used infrequently.
The flow looks like this:
sequenceDiagram
    participant Client
    participant API
    Client->>API: POST /api/token/ with username/password
    API-->>Client: {access: "...", refresh: "..."}
    Client->>API: GET /api/protected/ with Authorization: Bearer <access>
    API-->>Client: 200 OK with data
    Note over Client,API: Access token expires
    Client->>API: POST /api/token/refresh/ with refresh token
    API-->>Client: {access: "new access token"}
    Client->>API: GET /api/protected/ with new access token
    API-->>Client: 200 OK with data
The client never sends credentials again after the initial login — it just exchanges the refresh token for new access tokens. If the refresh token expires or is blacklisted, the user has to log in again.
Configuring Simple JWT
Simple JWT's behavior is controlled through SIMPLE_JWT in your settings. Here are the settings you'll almost certainly need to tune:
from datetime import timedelta

SIMPLE_JWT = {
    # How long an access token stays valid
    'ACCESS_TOKEN_LIFETIME': timedelta(minutes=15),

    # How long a refresh token stays valid
    'REFRESH_TOKEN_LIFETIME': timedelta(days=7),

    # Issue a new refresh token when the old one is used (token rotation)
    'ROTATE_REFRESH_TOKENS': True,

    # Blacklist the old refresh token when rotation happens
    # Requires 'rest_framework_simplejwt.token_blacklist' in INSTALLED_APPS
    'BLACKLIST_AFTER_ROTATION': True,

    # Signing algorithm — HS256 is fine for most cases
    # Use RS256 if you need asymmetric signing (multiple services)
    'ALGORITHM': 'HS256',

    # Key used to sign tokens — use your Django SECRET_KEY or a separate key
    'SIGNING_KEY': SECRET_KEY,

    # What the Authorization header type should be
    'AUTH_HEADER_TYPES': ('Bearer',),

    # Claim in the payload that identifies the user
    'USER_ID_FIELD': 'id',
    'USER_ID_CLAIM': 'user_id',
}
A few settings deserve more explanation:
ACCESS_TOKEN_LIFETIME: The default 5 minutes is aggressive. In practice, 15 minutes is common. Very short lifetimes mean clients need to refresh more frequently, which adds latency. Very long lifetimes reduce security. 15 minutes balances these well for most apps.
REFRESH_TOKEN_LIFETIME: This is really "how long until users need to log in again." Set it based on your UX requirements. A week is reasonable for consumer apps. Enterprise apps might use 1 hour of refresh lifetime with a requirement to re-authenticate for sensitive operations.
ROTATE_REFRESH_TOKENS and BLACKLIST_AFTER_ROTATION: Token rotation means each time you use your refresh token, you get a new one back. The old one is blacklisted and can't be used again. This dramatically limits the blast radius of a stolen refresh token — once the legitimate user uses their refresh token (getting a new one), the stolen copy becomes invalid. Enable both of these in production.
To enable blacklisting:
INSTALLED_APPS = [
    ...
    'rest_framework_simplejwt.token_blacklist',
]
Then run python manage.py migrate to create the blacklist tables.
ALGORITHM: HS256 (HMAC-SHA256) uses a shared secret key — the same key signs and verifies. This is fine when your API is a single service. If you have multiple services that need to verify tokens (microservices architecture), consider RS256 (RSA), where you sign with a private key and each service verifies with a public key — no need to share the secret.
Adding Custom Claims to JWT Tokens
The default JWT payload includes the user ID and token type. Often you want more — the user's role, organization ID, feature flags. Simple JWT makes this straightforward by letting you subclass TokenObtainPairSerializer:
from rest_framework_simplejwt.serializers import TokenObtainPairSerializer
from rest_framework_simplejwt.views import TokenObtainPairView

class CustomTokenObtainPairSerializer(TokenObtainPairSerializer):
    @classmethod
    def get_token(cls, user):
        token = super().get_token(user)

        # Add custom claims
        token['email'] = user.email
        token['is_staff'] = user.is_staff
        token['organization_id'] = user.profile.organization_id

        return token

class CustomTokenObtainPairView(TokenObtainPairView):
    serializer_class = CustomTokenObtainPairSerializer
Use CustomTokenObtainPairView in your URLs instead of the default. Now every token will include those fields in the payload.
Warning: Don't put sensitive information in JWT payloads. The payload is base64-encoded but not encrypted — anyone who gets the token can decode and read it. User IDs and roles are fine. Passwords, SSNs, and API keys are not.
Custom Authentication Schemes
Sometimes you inherit a legacy authentication system or need to authenticate against an external service. DRF makes it easy to implement your own authenticator by subclassing BaseAuthentication and implementing two methods:
from rest_framework.authentication import BaseAuthentication
from rest_framework.exceptions import AuthenticationFailed
from myapp.models import APIKey

class APIKeyAuthentication(BaseAuthentication):
    def authenticate(self, request):
        api_key = request.headers.get('X-API-Key')

        # If the header isn't present at all, return None
        # This tells DRF "this authenticator doesn't apply, try the next one"
        if not api_key:
            return None

        try:
            key = APIKey.objects.select_related('user').get(
                key=api_key,
                is_active=True
            )
        except APIKey.DoesNotExist:
            # The header IS present but the key is invalid
            # Raise an exception rather than returning None
            raise AuthenticationFailed('Invalid API key')

        # Return (user, auth) tuple
        return (key.user, key)

    def authenticate_header(self, request):
        # This is what goes in the WWW-Authenticate header for 401 responses
        return 'X-API-Key'
The contract is simple:
- Return
Noneif this authenticator doesn't recognize the credential format (another authenticator should try) - Raise
AuthenticationFailedif the credential format is recognized but invalid - Return
(user, token)tuple on success
The authenticate_header method controls what DRF puts in the WWW-Authenticate response header, which tells clients how to authenticate. If you omit it, DRF returns 403 instead of 401 for unauthenticated requests (same behavior as SessionAuthentication).
Multi-Authentication: Combining Schemes
In practice, many APIs need to support multiple authentication methods simultaneously. A common case: your DRF API is consumed by both a JavaScript SPA (using session auth for the same-domain frontend) and mobile apps or third-party services (using JWT). You can support both by listing multiple authenticators:
REST_FRAMEWORK = {
    'DEFAULT_AUTHENTICATION_CLASSES': [
        'rest_framework_simplejwt.authentication.JWTAuthentication',
        'rest_framework.authentication.SessionAuthentication',
    ]
}
DRF tries JWT first. If the request has a Bearer token, JWT authenticates it. If there's no Bearer token but there is a session cookie, SessionAuthentication handles it. This works cleanly.
The implication for API consumers: document your supported auth schemes clearly. It's confusing for developers consuming your API to discover through trial and error that both session and bearer tokens work. The WWW-Authenticate header in 401 responses only reflects the first authenticator's challenge, not all of them.
The ordering also matters for the 401/403 behavior described earlier. Since JWTAuthentication implements authenticate_header, requests that fail authentication will get 401 responses — which is the right behavior for a public API.
Security Considerations
Authentication is a security boundary. Here's the practical security checklist, organized by what actually matters:
HTTPS is non-negotiable. Every authentication scheme discussed here — including JWT — is vulnerable to token theft if requests travel over plain HTTP. A stolen JWT token is valid until it expires, and there's no reliable way to revoke it short of blacklisting. Use HTTPS everywhere, full stop.
Token storage in clients. Where clients store tokens is a recurring debate. For web browsers:
localStorageis vulnerable to XSS attacks — any injected script can read ithttpOnlycookies can't be read by JavaScript, making them XSS-resistant, but require CSRF protection- In-memory storage is safest against XSS but tokens don't survive page refresh
There's no perfect answer. Many production apps use httpOnly cookies for refresh tokens (the long-lived ones) and in-memory or localStorage for short-lived access tokens. The key insight: keep your access tokens short-lived enough that XSS exposure is time-limited, and protect your refresh tokens with httpOnly cookies.
Protect the refresh endpoint. Your token refresh endpoint is the most sensitive endpoint in a JWT setup — it's where stolen refresh tokens do damage. Consider:
- Rate limiting the refresh endpoint more aggressively than other endpoints
- Logging all refresh events for audit trails
- Implementing IP-based anomaly detection for refresh patterns
Don't validate tokens in middleware. DRF's authentication machinery runs inside the view layer. Don't try to validate JWT tokens in Django middleware — it bypasses DRF's exception handling and can produce confusing errors.
Rotate your signing keys periodically. With HMAC signing (HS256), your SECRET_KEY or JWT signing key should be rotated periodically. All existing tokens immediately become invalid when you do this (which is a feature, not a bug, during a security incident). Simple JWT's SIGNING_KEY setting lets you separate the JWT key from Django's SECRET_KEY for independent rotation.
Here's a summary of how the built-in authentication schemes compare:
| Scheme | Stateless | Expiry | Per-device revoke | Browser-friendly | Use when |
|---|---|---|---|---|---|
| Basic | Yes | No | No | Poor | Internal tools, testing, HTTPS only |
| Session | No | Session lifetime | Yes (invalidate session) | Yes | Same-domain browser apps |
| Token | No | No | No | Possible | Simple APIs, prototypes |
| JWT (Simple JWT) | Yes | Yes | With blacklisting | Possible | Production APIs, mobile, SPAs |
The Simple JWT documentation covers additional configuration options including TokenVerifyView, which lets you expose a verification endpoint — useful when third-party services need to confirm token validity without access to your signing key.
Authentication is the foundation that permissions build on. Once DRF has established who made the request — placing a User instance in request.user and the credential in request.auth — the permission system can make the actual access decision. That's the next section.
Only visible to you
Sign in to take notes.