Essential Leatherworking Tools: What You Actually Need to Get Started
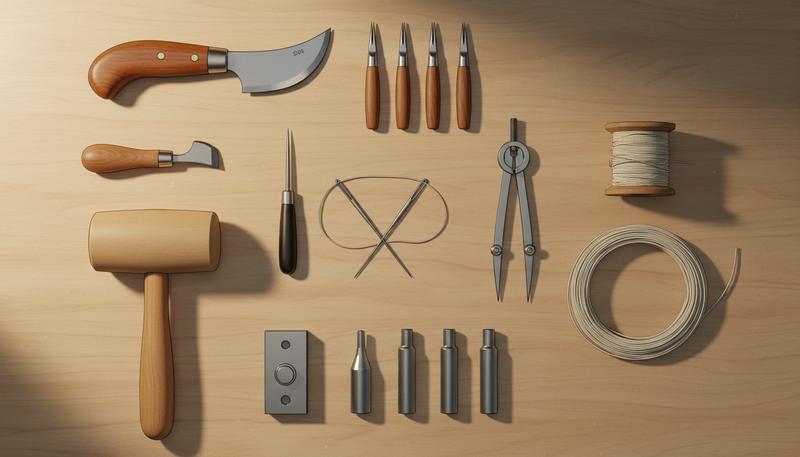
Tools of the Trade — What You Actually Need
The Beginner Mistake: Buying Everything at Once
Walk into any leatherworking supply store or scroll through a forum thread and you'll find these elaborate lists: 40, 50, sometimes 60+ tools that various people swear are "essential." It's deeply misleading. Here's the truth: you can make a wallet, a belt, and a sheath with maybe 12 to 15 tools. Everything else you add later, as projects require it.
There's real psychology at play here. Experienced craftspeople have spent years accumulating tools, often for very specific tasks or particular leather types. When forums and catalogs list everything together, they rarely distinguish between "you genuinely need this," "this makes life easier," and "this is nice to have someday." And let's be honest — supply companies profit from comprehensive tool sales. Marketing pushes toward exhaustive rather than essential. So a beginner absorbing all that noise can easily drop $400–600 on tools they won't touch for months, if ever.
A smarter approach is thinking of your toolkit in stages: Essential Starter (your first 15–18 months), Intermediate Expansion (as you tackle specific techniques), and Advanced Refinement (specialized mastery tools). We're focusing on stage one here.
Cutting Tools
A quality cutting mat. Before anything else, get a proper self-healing cutting mat. A cheap mat is a false economy — it grooves, your blade catches in old cuts, your work suffers. Aim for 18"×24" or larger.
The cutting mat is genuinely your foundation. Unlike the thin rubber mats at drugstores, a self-healing cutting mat has a polymer composition where surface fibers re-bond after cuts, maintaining a smooth surface indefinitely with proper care. A grooved mat doesn't just annoy you — it causes your blade to catch, leading to irregular cuts and potentially ruined leather. An 18"×24" mat typically runs $20–35 and lasts 10+ years. Store it flat (never rolled), and rotate your work across the surface instead of cutting in the same spot repeatedly — that distributes wear and keeps the mat performing.
A steel ruler or straight edge. Eighteen-inch stainless steel, ideally with cork backing to prevent slipping. You'll reach for this on nearly every cut.
The cork backing isn't cosmetic — it keeps your ruler from sliding across the mat while you're cutting, which kills consistency. A slipping ruler while cutting leather can easily cost you a $15–20 piece of material. Stainless steel won't rust from leather moisture or accidentally spilled burnishing oil the way mild steel will. If your ruler lacks clear markings, take a permanent marker and add 1-inch increments along the edge. This lets you eyeball distances without reading numbers constantly.
A head knife (also called a round knife). This is the most versatile cutting tool you'll own. The rounded, crescent-shaped blade handles straight lines, curves, and intricate shapes with equal grace. Learning it takes practice, but it becomes indispensable once you do. Good starter options include the Vergez Blanchard or the Tandy Pro series.
The head knife's design is deceptively elegant. The curved blade naturally rocks on a point at its deepest curve, giving you real control over pressure and direction. For straight cuts, you rock the blade perpendicular to your ruler. For curves, the blade's shape lets you follow flowing lines without the awkward rotating motions you'd need with a flat blade. Learning takes maybe 30–50 practice cuts on scrap leather — you'll feel clumsy at first, then suddenly it "clicks" and becomes meditative. The motion is rhythmic: rock the blade, roll slightly, rock again. Here's the practical bit: sharpen your head knife with a leather strop and stropping compound between projects, and get it professionally honed or re-ground every 1–2 years.
A rotary cutter. Great for straight cuts and gentle curves as a supplement to the head knife. The 45mm size handles most situations.
The rotary cutter is your friend if the head knife feels intimidating initially. The circular blade rolls along your ruler, creating consistent, uniform cuts with almost no learning curve. The tradeoff is less precision on tight curves and more hand pressure, which gets tiring over long sessions. Many craftspeople use both: rotary cutters for straight strips and panels, head knives for curves and shaped pieces. If you're starting with one, the head knife teaches more fundamental skills and is arguably the better long-term choice.
A strap cutter. Making belts or long straps? A strap cutter (also called a draw gauge) cuts long, perfectly parallel strips in a single pass. Adjustable width is essential. Tandy Craftool or Barry King versions are both solid options.
This is a specialized tool, but if you plan more than one belt, it transforms the work. Instead of trying to cut a 48-inch strip straight with a ruler and head knife (genuinely difficult to keep perfectly parallel), you set the strap cutter to your width and pull it down the leather — both edges cut at once with exact parallelism. It typically costs $25–35 and saves enormous frustration and wasted material. You can build a DIY version by carefully gluing two small metal blades parallel in a wooden handle, and many makers have published plans online. But the commercial versions are worth it.
A swivel knife. Planning to do any tooling or carving? The swivel knife is your tool. It has a chisel-edged blade mounted on a pivot bearing that rotates as you change direction, letting you cut flowing curves and patterns into the leather surface.
This is where leatherworking becomes art. Unlike fixed-blade knives, the swivel bearing allows the blade to rotate freely as your hand curves, which lets you carve expressive, natural designs without lifting the blade or fighting the tool's momentum. It takes dedicated practice — you're essentially drawing with a knife — but the payoff is personalizing your work with custom patterns, designs, lettering. A decent swivel knife starts around $12–15 for basic models and climbs to $35+ for premium Italian or German versions. Not planning to tool anything yet? Skip it and add it later when you're ready to explore that side of the craft.
A skiving knife or bench knife. Used to thin leather for folds, overlaps, and edge transitions. A good skiver (sometimes called a Japanese skiving knife) is thin, extremely sharp, and angled for controlled shaving cuts.
Skiving thins leather gradually to create smooth transitions where pieces overlap — like where a flap attaches to a bag, or where a belt strap overlaps itself. A cheap skiving knife won't hold an edge and instead compresses and tears fibers rather than cutting cleanly. A proper skiver has a sharp, low-angle edge and requires confident technique. You place the blade at a shallow angle and use controlled, drawing-cut motions (pulling toward you) to remove thin shavings. This is one place quality genuinely matters — a $35 Japanese skiving knife outperforms a $12 generic one dramatically. For early projects, you can often dodge heavy skiving, so this might be a "stage 2" tool if you're budget-conscious.
Stitching Tools
Stitching chisels and pricking irons. These create evenly spaced stitching holes. A pricking iron looks like a fork and creates dimple marks without fully piercing — you then use an awl to pierce through. A stitching chisel pierces all the way and is common in North American leatherworking. European craftspeople tend to prefer pricking irons plus an awl for finer control. Get a 4-prong and a 2-prong for straight runs and corners. Typical stitch spacing is 3–4mm.
Understanding these requires knowing the two main traditions. The North American approach (pricking iron followed by awl-piercing, or direct chisel usage) is efficient and produces fast work. The European approach (pricking iron for marking, then awl for precise piercing) is slower but offers more control and was historically the standard for fine work. For beginners, a 4-prong stitching chisel with 3.5mm spacing is practical: one tool, straight through, consistent holes. As you advance, many craftspeople blend both methods — stitching chisel for straight runs (fast), pricking iron plus awl for curves and corners (precise).
Hole spacing matters more than you'd expect. At 3–4mm apart, stitches are close enough for security but loose enough that you're not wrestling with every single one. Wider spacing (5mm+) is faster but looks less refined. Tighter spacing (2–3mm) looks beautiful but is slow and hard on your hands. The 3.5mm standard represents the practical sweet spot. Different projects call for different spacings as you develop — a utility belt might use 4.5mm, while a fine wallet might use 3mm.
A stitching awl. A stitching awl is a pointed tool for piercing holes in leather and canvas. In two-needle saddle stitching, you often use an awl to deepen the hole as each stitch is placed, making needle-pulling much easier. Diamond-shaped awl blades are the leatherworking standard — they make clean, self-closing holes.
The shape matters significantly. A round-point awl (typical for general metalwork) punches a hole; a diamond-point awl (the leatherworking standard) cuts a small cross-shaped slit that compresses around your needle, creating a neater appearance and better holding power. When you use an awl with a stitching chisel, you place your holes first, then use the awl to deepen and fully pierce each hole as you stitch, allowing easier needle-pulling and ensuring complete penetration. This is especially valuable for heavier leathers where a single strike might not fully pierce through.
A stitching pony (stitching horse). This clamps your work between leather-faced jaws while you stitch, freeing both hands for the stitching motion. You can substitute a bench vise with leather-wrapped jaws or hold the work in your lap between your knees. But once you try a proper stitching pony, you won't go back.
The stitching pony deserves real discussion because it genuinely changes your work. For the first few projects, most people stitch with leather in their lap or clamped to a bench vise. This works, but your hands partly stabilize the work instead of focusing on stitching. A proper stitching pony (a wooden bench with a clamp mechanism and leg brace) clamps your leather firmly between padded jaws, mounted low enough that you sit astride or beside it with your legs and knees stabilizing it. Your hands are now completely free for needle control, tension management, rhythm. After hand-stitching a wallet while holding it in your lap, then doing an identical wallet with a stitching pony, the difference is profound — faster, less fatigue, better stitch consistency, more enjoyment. A good stitching pony costs $80–150 and lasts a lifetime. Or build a DIY version from 2×4s with a 1×8 top piece and a hardware-store C-clamp, wrapping the jaws with thick leather. Many makers have published plans online.
Harness needles. Blunt-tipped needles, sizes #1–#4, for leatherwork. The blunt tip prevents accidentally splitting thread as you stitch. You always use two needles simultaneously in saddle stitching.
The blunt tip is crucial and often overlooked by beginners. Sharp needles (like sewing machine needles) frequently split your working thread mid-stitch, weakening the seam and creating weak points. Harness needles have a large, rounded eye for thick thread and a rounded point that parts fibers rather than piercing them. Get sizes #2 or #3 for most work — #1 for very fine thread and detailed work, #4 for extremely heavy leather. Always use two needles in saddle stitching, each waxed end threaded separately, so you're making each stitch with doubled thread from two directions. This redundancy is why saddle stitching lasts — if one thread breaks, the other still holds.
Waxed thread. Linen thread (traditional/classic work) or polyester thread (durability and moisture resistance) in appropriate thicknesses. Thread is sold in Tex ratings — Tex 45 is fine, Tex 70 is medium, Tex 80–90 is heavy. For most wallet and bag work, Tex 70 is ideal. Pre-waxed thread is convenient; you can also wax your own with a beeswax block or commercial thread wax.
Thread selection is more nuanced than it appears. Linen thread (made from plant fibers) is the traditional choice — beautiful, naturally textured, looks authentic, slightly stiffer than polyester, easier to work with. However, linen can absorb moisture and eventually rot in very damp conditions. Polyester is synthetic, more moisture and UV-resistant, and more forgiving of amateur technique (less likely to split, less fussy about tension). Many craftspeople use linen for showcase pieces and polyester for work pieces. The Tex rating is a weight measure: lower numbers are thinner, higher numbers thicker. Tex 70 is the "Goldilocks" choice — visible enough to look intentional, not so thick it's hard to work. Wax does multiple jobs: smooths the thread, protects from fraying, adds stiffness for easier threading, creates some water resistance. Pre-waxed thread typically costs $0.50–1.50 per spool; waxing your own from bulk thread is cheaper but takes more effort.
Edge and Finishing Tools
Edge beveler. A small chisel-like tool that removes the sharp 90° corner from cut leather edges, creating a gentle chamfer. This inexpensive tool makes an enormous difference in how professional your finished work looks. Get a size #2 for most work (size #1 for thinner leather, #3 for heavier pieces).
The edge beveler might be the highest-return-on-investment tool in leatherworking. For $8–12, this simple tool transforms your work from "homemade" to "professional." Why? Beveled edges are a universal signal of care and skill. When you hold a quality leather wallet, your hand immediately registers soft, rounded edges instead of sharp, knife-like corners. A size #2 beveler (typically 45° angle, 3/8" wide) handles 95% of leather thicknesses. The technique is simple — run the beveler around all exposed edges at a slight angle, and the edge shifts from sharp to gently rounded. The result looks deceptively simple but genuinely transforms the feel and apparent quality of the finished piece.
Edge slicker/burnisher. Used with a burnishing compound (tokonole, beeswax, or gum tragacanth) to compress and polish leather edge fibers into a smooth, hard surface. You can buy purpose-made slickers or make your own from dense hardwood like rosewood or boxwood with a rounded groove carved into it.
The edge burnisher completes what the edge beveler started. After beveling, the edge is rounded but still has loose fibers on the surface. A slicker — a flat or slightly curved hard surface — combined with a burnishing compound compresses those fibers into a dense, hard, shiny surface. The compound (tokonole is most common, made from vegetable tannins) softens fibers slightly, allowing them to compress and flow, then hardens as it dries. The result is an edge that looks and feels polished, protects better against moisture, lasts longer. You can make a functioning slicker from hardwood offcuts (boxwood is ideal), or buy one for $15–25. Burnishing compounds range from $5–15 per jar.
Sandpaper. Get 120, 220, and 400 grit. You'll work through the grits to smooth edges before final burnishing.
Progressive sanding through grits separates amateur from professional edge finishing. 120 grit removes roughness from cutting. 220 grit smooths further. 400 grit creates a polished surface ready for burnishing. Skip grits and coarser scratches show through the final burnish. Most craftspeople keep sanding sponges (which conform to curved edges better than flat paper) in these three grits, spending 30–60 seconds per edge at each grit. It sounds tedious but becomes meditative once you develop the rhythm, and the results justify the effort.
Wing divider or edge groover. A groover cuts a channel parallel to the edge at a set distance, guiding your stitching chisel and also recessing the stitching slightly below the surface, protecting it from wear.
The edge groover is a subtle refinement with practical value. Beyond aesthetics, an edge groove serves function: by recessing your stitching below the surface, it protects the thread from scuffing against surfaces as the item is used. For a wallet living in a pocket, this extends stitch life significantly. A basic groover is a small chisel with a groove-shaped edge, set to cut 1/8" to 3/16" from the edge at a typical depth of 1/16" to 1/8". Some groove operations are pure refinement; others are practical durability investments. For early projects this is optional, but it's worth adding once you're comfortable with basics.
Hardware Setting Tools
Snap setter. A punch and anvil set for installing spring snaps (line 20 for light work, line 24 for heavier use). Most sets include everything you need.
Snaps are the most common hardware on leather goods — found on wallets, bags, sheaths. A snap has four pieces: a male stud, a female cup, and two backing plates on either side of the leather. A snap setter is a punch (which strikes the male stud through leather into the female cup) and an anvil (which holds the assembly in place, absorbs impact). Line 20 snaps are smaller (lightweight leather, card holders), line 24 are standard (most wallets and bags). A basic snap setter kit costs $10–15 and includes dies for both sizes. The technique is straightforward: hole punch your leather, assemble the snap components, place in the setter, strike with a mallet.
Rivet setter. For setting copper rivets or double-cap (tubular) rivets. A basic rivet setter is just a punch and a concave anvil cap.
Rivets are an alternative to snaps, creating a more decorative, industrial aesthetic. A copper rivet has a shaft and a domed cap; you punch a hole, insert the rivet shaft through from the back, place the assembly on the rivet setter anvil, set the domed cap on top of the shaft, and strike to mushroom the shaft back, creating a permanent, decorative fastener. Rivets are more permanent than snaps (you can't easily remove them) but visually striking. A rivet setter is cheaper than a snap setter ($8–12) but requires careful aim and consistent striking force. Beginners often overstrike or understrike their first rivets — it takes practice to develop the feel.
Hole punches. Rotary punches work for light leather; drive punches (struck with a mallet) are more precise for heavier leather. Get sizes ranging from 3mm to 8mm.
Hole punches are essential and come in two styles. Rotary punches (with a gear mechanism) work by twisting and are good for thin leather and quick work. Drive punches are struck with a mallet and create more precise holes in heavier leather — the downward force fully penetrates thick hides where a rotary punch might compress without fully piercing. A set of drive punches (4mm, 6mm, 8mm are most useful) costs $15–25. The difference between a sharp, clean hole and a ragged, partially punched hole is dramatic in appearance and functionality. Always punch from the flesh (back) side onto a striking surface to avoid marring the grain side.
A mallet. Use rubber or rawhide, never steel. It will mushroom your tool handles. A 16-oz wooden or rawhide mallet is ideal.
The mallet is deceptively easy to get wrong. A steel hammer (or claw hammer) transfers too much shock and deforms wooden tool handles, gradually mushrooming the striking end and making it dangerous. A rubber or rawhide mallet distributes impact gently and is far quieter. A 16-oz rawhide mallet costs $12–18 and is the standard — heavy enough for solid impact, light enough for extended use without fatigue. Technique matters: strike with a smooth, confident swing rather than tentative taps. One solid strike beats three uncertain ones.
A granite or marble striking surface (optional but genuinely useful). A marble or granite tile ($5 at a home improvement store) works perfectly as a striking surface for punches and chisels. It's hard, flat, and doesn't absorb the blow like wood does.
While optional, a dedicated striking surface extends tool life significantly. Striking tools are designed to sit on a hard, smooth surface. Hitting them on a wooden workbench spreads impact and damages both bench and tool. A 12"×12" granite or marble tile from a home improvement store costs $3–8, sits flat, won't shift, and lasts forever. Place it on your workspace when you need to set hardware, and you've protected your investment and your furniture.
A Realistic Starter Kit
You can genuinely get started for $80–150 if you shop carefully:
- Cutting mat + steel ruler: $30–40
- Head knife or rotary cutter: $20–30
- 4-prong stitching chisel (3.5mm spacing): $15–25
- Diamond awl: $10–15
- 2 harness needles + waxed thread: $10–15
- Edge beveler #2: $8–12
- Hole punches (set): $10–20
- Rubber mallet: $10–15
- Basic snap setter: $10–15
Total: roughly $123–182, depending on where you shop and which brands you choose.
This kit handles wallets, card holders, small bags, and simple belts. Add a strap cutter when you're ready for belts, a swivel knife when you want to tool, and a stitching pony when you're tired of holding work in your knees.
Sourcing and Quality Considerations
Tool quality exists on a genuine spectrum, not just cosmetics. A $40 head knife from a leather supply specialty retailer holds an edge 10 times longer than an $8 "leather cutting" knife from a general craft store. The difference is steel composition, hardening, and geometry. Spend more on cutting tools (head knife, stitching chisel, skiving knife) and less on striking tools (mallets, punches).
Online platforms like Amazon have made leatherworking tools accessible, but quality varies wildly. Established retailers like Tandy Leather, Barry King, and Vergez Blanchard have reputations to protect and consistent quality standards. For your first purchase, paying slightly more for known-good tools from trusted sources beats hunting for bargains. A $25 stitching chisel that holds registration and cuts clean holes is worth far more than an $8 chisel that skews and creates ragged holes. Poor tools create frustration and wasted leather; good tools create joy and quality work.
Expanding Your Kit Later
Once you've completed your first 3–4 projects with your starter kit, you'll have enough experience to know which specialized tools would genuinely improve your work. Some craftspeople discover they love edge finishing and add all the burnishing tools. Others fall in love with tooling and carving and invest in swivel knives, stamps, and modeling tools. Others realize they want to work with heavier hides and invest in skiving knives and heavier punches. The beauty of starting small is building a kit tailored to your actual interests and style rather than a generic "everything."
Only visible to you
Sign in to take notes.