How to Edit Family Videos From Raw Footage to Final Cut
The Edit: Assembling Your Family Documentary From Raw Footage to Finished Film
You've made your decisions about music: where it goes, how loud it sits, what rights you need. You've learned to use it strategically, to let it serve the story rather than dominate it. Now comes the phase where all your planning — the interviews you conducted, the B-roll you gathered, the sound you recorded, and yes, the music you've licensed — finally comes together into a coherent film. This is the edit.
There's a moment every filmmaker knows. You close your laptop after the last day of shooting, hard drive full of footage, and it hits you: the actual work hasn't started yet. The interviews are raw and unshapen. The B-roll is scattered across dozens of clips. That beautiful thing your grandmother said at minute forty-seven of a ninety-minute recording is still buried there, waiting to be found. The music cues you've selected are waiting for their moment. This is where everything you've prepared comes into focus.
For most family filmmakers, the edit is where projects go to die — not because editing is impossibly hard, but because nobody told them how to approach it. Without a workflow, you're just wandering through your footage hoping the film will assemble itself. What follows is a complete editing workflow adapted specifically for family documentary — the same practical process that turns raw interviews, B-roll, natural sound, and music into something your family will want to watch in twenty years. The work is technical in places, but never forget: editing is fundamentally a storytelling act.
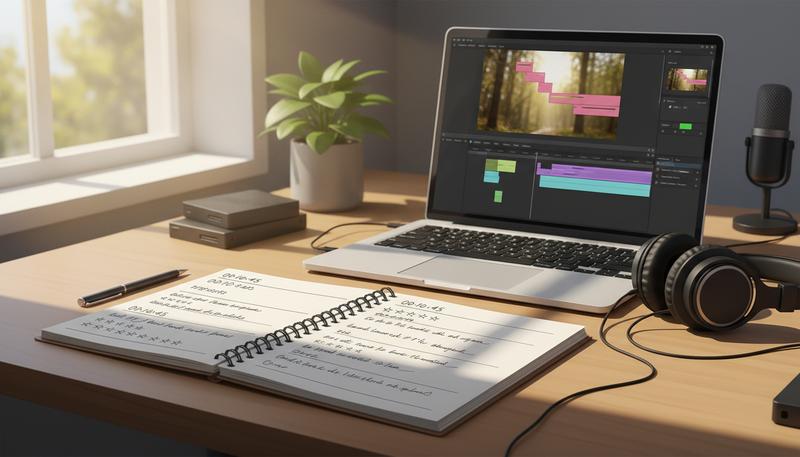
Choosing Your Editing Software
Let's address the first obstacle: which software? The honest answer is that the software matters less than most people think. What matters is that you pick something, learn it reasonably well, and commit to finishing. That said, different tools suit different situations.
iMovie (Free, Mac and iOS)
iMovie is where most family filmmakers start, and there's no shame in that. It handles all the core tasks — cutting, layering, adding music and titles — without overwhelming you. The learning curve is gentle. You can make a genuinely good family documentary in iMovie. You'll hit its ceiling eventually (limited color correction, basic audio mixing), but not before you've finished your first film.
The practical benefit: it's already on your Mac, which is probably why you're reading this. That zero-friction entry point matters more than you'd think when you're trying to actually finish something.
DaVinci Resolve (Free, or Studio version at $295)
Here's where things shift. DaVinci Resolve is free software that ships with professional-grade color correction, audio mixing (the "Fairlight" page), and a full editing suite. For family documentary work, the free version has essentially no meaningful limitations.
The catch is the learning curve. Resolve's interface is organized across multiple "pages" — Edit, Color, Fairlight, Deliver — which is powerful but initially disorienting. Plan to spend a weekend on tutorials before your first real project. Once it clicks, though, it's deeply satisfying. The color correction tools alone are worth the investment of time.
If you want free software that can grow with you indefinitely, DaVinci Resolve is the answer. It handles everything in this chapter with room to spare.
Final Cut Pro ($299.99, Mac only)
Final Cut Pro is what you get when Apple decided to make a professional-grade version of iMovie. It's fast — genuinely, almost embarrassingly fast — because it's built specifically for Apple hardware and takes full advantage of the M-series chips. The magnetic timeline, which automatically closes gaps when you delete clips, is either brilliant or infuriating depending on your background, but most people land on brilliant within a few hours.
For family documentary, Final Cut Pro is the sweet spot if you're on a Mac and willing to spend the money. It's more capable than iMovie, more approachable than Resolve, and faster than Premiere Pro on Apple Silicon. The one-time purchase (no subscription) is genuinely attractive in a world of software subscriptions.
Adobe Premiere Pro (Subscription, $~55/month)
Premiere Pro is the industry standard for documentary filmmakers, used widely across professional documentary production, and it earns that status. It's flexible, powerful, and integrates seamlessly with After Effects (for motion graphics) and Audition (for audio). If you're already in the Adobe ecosystem — Lightroom for photos, Photoshop for images — Premiere makes sense.
The monthly subscription fee is the obvious friction point. For a family filmmaker producing two or three films a year, that cost is hard to justify. But if you're serious about improving your skills long-term, Premiere's ubiquity means tutorials, templates, and community support are everywhere.
The honest recommendation: Start with iMovie if you're new and on a Mac. Move to DaVinci Resolve when you hit iMovie's ceiling. Consider Final Cut Pro if you find yourself editing regularly and want speed. Only subscribe to Premiere if the Adobe ecosystem already makes sense for your life. The software genuinely doesn't make the film — your attention to story does.
graph TD
    A[New to Editing?] -->|Yes| B[iMovie - Free, Mac/iOS]
    A -->|No| C[Want to Grow Long-Term?]
    B --> D[Hit iMovie's Limits?]
    D -->|Yes| C
    C -->|Free Option| E[DaVinci Resolve]
    C -->|Mac + Budget| F[Final Cut Pro]
    C -->|Adobe Ecosystem| G[Premiere Pro]
    E --> H[Color + Audio Tools Built In]
    F --> I[Speed + Magnetic Timeline]
    G --> J[Industry Standard + Integrations]
Ingesting and Organizing Your Footage
This is the part everyone skips because it feels like bureaucracy before the real work. It is not bureaucracy. It is the foundation of your sanity. Every professional editor will tell you the same thing: the hours you spend organizing before you cut will save you triple that time in the edit.
Here's a folder structure that works for family documentary:
/Documentary_Title_Year/
    /01_RAW_FOOTAGE/
        /Interview_GrandmaRuth_2024-11-15/
        /BRoll_Thanksgiving_2024-11-15/
        /Interview_Dad_2024-11-16/
    /02_AUDIO/
        /Scratch_Track/
        /Music/
    /03_PROJECT_FILES/
    /04_EXPORTS/
        /Rough_Cut/
        /Fine_Cut/
        /Final/
    /05_STILLS/
    /06_GRAPHICS/
The numbering forces your operating system to sort folders in workflow order. The dates in folder names let you reconstruct your shoot sequence. The separation of raw footage from project files means you'll never accidentally overwrite an original.
Naming conventions: Rename your files before you import them into your editing software. Camera-generated names like MVI_4072.MP4 are archaeologically useless. Interview_GrandmaRuth_Cam1_01.MP4 tells you everything you need when you're six weeks into the edit and can't remember what you shot when. Yes, this takes time. No, you will not regret it.
Copy before you cut: Before you do anything — anything — copy your original footage to a second location. An external hard drive, a cloud backup, a second hard drive in a different room. Your footage is not replaceable. Your time is not replaceable. A hard drive failure isn't a matter of if; it's a matter of when. Documentary Film Academy's editorial workflow emphasizes this before any other step, and for good reason.
Proxy files: If you're editing 4K footage on an older laptop, you may find your computer stuttering and dropping frames — not because your edit is wrong, but because your hardware can't process the data fast enough in real time. Both DaVinci Resolve and Premiere Pro can generate "proxy" files: lower-resolution duplicates of your original footage that edit smoothly, then automatically swap back to the full-resolution originals for export. This is not cheating. This is how feature films are edited. If your machine is struggling, proxies are your friend.
Reviewing and Logging Your Footage
Now comes the least glamorous but most important step: watching everything you shot and taking notes before you cut a single frame.
The amateur instinct is to open the editing software immediately and start dropping clips on a timeline. Resist this. Professional documentary editors almost universally do a logging pass first — watching footage, marking the moments that matter, and building a mental (or written) map of what they have before they touch the timeline.
The logging method: As you watch each clip, write down:
- The timecode (or approximate time) of good moments
- A one-sentence description of what's happening
- A rating: strong (★★★), usable (★★), skip (★)
You don't need special software for this — a simple spreadsheet or even a paper notebook works. What you're building is a map. When you're mid-edit and can't remember where your grandmother talked about meeting your grandfather for the first time, you'll look at your log and find it in fifteen seconds instead of twenty minutes.
The watching discipline: Watch in full for your interview footage — not at 2x speed, not skimming. The difference between a good moment and a great moment is often a three-second pause, a slight vocal break, an expression. These vanish at 2x. For your B-roll, you can move faster — you're mainly checking for focus, stability, and composition.
Mark your selects: Most editing software lets you mark "in" and "out" points on clips and create subclips or bins of selected material. Use this. Don't pull entire 45-minute interviews into your timeline. Pull the 12 minutes that matter.
The goal of the logging pass is to shrink your mountain of footage into a manageable set of selects — the raw material your edit will actually be built from. For a typical 15-minute family documentary, you might start with 4-6 hours of footage and log down to 45-60 minutes of selects. That's still a lot. The edit will take it further.
Building the Rough Cut: Radio Edit First
In Section 8, we covered the radio edit in depth — assembling the film from its audio alone, without pictures, to test whether the story works as pure narrative. If you haven't done that work yet, go back. If you have, your radio edit is the spine of your rough cut.
The radio edit principle is simple and profound: lay out all your dialog and narrative audio on the timeline first, in the order that tells your story, and get that working before you think about images. As Vashi Visuals puts it, "If you can get the audio dialed in, everything else will fall into place."
This matters enormously for family documentary because our instinct is to cut on pictures — we fall in love with a beautiful shot of the kids running in the yard and want to show it, so we place it and try to build around it. This is backwards. Start with what people are saying and feeling. The pictures serve the audio, not the other way around.
Your rough cut timeline structure:
Start by placing your interview selects in narrative order. Don't worry about length yet — if you've chosen a moment, put it in. A rough cut is supposed to be rough. Most professional documentary rough cuts are typically cut within 10% longer than the intended final film, not two to three times the length. This ensures efficient feedback cycles while maintaining structural integrity. Yours probably should too.
Once your interview audio is laid out, listen through the whole thing without watching. Close your eyes if it helps. Ask yourself:
- Does the story make sense?
- Are there redundancies — places where two different clips essentially say the same thing?
- Are there gaps — moments where you need something to bridge two ideas?
- Does the emotional arc track? Does the opening earn the ending?
Fix the audio structure before you add pictures. This is the discipline. It's uncomfortable because pictures are fun and audio editing feels dry. Do it anyway.
Adding B-roll to the rough cut:
Once your audio is working, begin laying B-roll over the interview sections. The function of B-roll at this stage isn't decoration — it's clarification and rhythm. When your dad talks about the family road trips they took every summer, you cut to footage of the car, the kids in the back seat, the roadside diners. The B-roll makes abstract memory concrete.
Don't try to be perfect here. Place B-roll that makes sense and move on. You're covering talking heads, establishing rhythm, and testing whether you have the footage you need. You'll discover gaps — moments where you needed a shot of something you didn't film. Note them. You may need to reshoot, supplement with archival photos, or rethink the edit.
A useful rule: try to have a B-roll cut every 8-12 seconds during interview sections. The camera cutting away isn't about hiding the interview subject — it's about maintaining visual momentum and reinforcing what's being said. Good documentary editing practice treats B-roll as essential narrative tissue, not decoration.
From Rough Cut to Fine Cut: Tightening the Film
Your rough cut is done. It's too long, some of it is slack, and watching it in full probably feels like a mild endurance test. This is exactly what it's supposed to feel like. Now the real shaping begins.
The transition from rough cut to fine cut is where editors earn their keep. It's the work of removing everything that isn't essential — not just the obviously bad moments, but the merely okay moments that dilute the great ones.
The 10% cut rule:
A useful discipline borrowed from writing: after completing a draft, find 10% to cut. Not because your film is 10% too long — it might be 40% too long. But the 10% rule forces you to be specific rather than global. You're not deleting sections; you're trimming frames from the beginning and end of clips, removing the slight pause before someone starts speaking, tightening the gap between one thought and the next.
Frames matter. Cutting two frames from the beginning of a clip might sound like nothing, but multiplied across a hundred edits, those cuts add up to a film that moves. The rhythm of a documentary is built in these tiny decisions, the ones that feel unconscious to viewers but that they absolutely feel.
Pacing questions to ask in every pass:
- When did I get bored? That's where you cut.
- When did I feel something? Don't cut there — protect that.
- Is this clip here because I love it, or because it serves the story? Love isn't enough.
- Does every interview segment say something the film would miss without it?
- Are there consecutive clips that make the same emotional point twice?
Handling redundancy: You'll often find that your subject made the same point in three different ways across three different interviews, and all three versions are good. You can only use one. This is genuinely hard. The criterion is: which version is most specific, most alive, most them? Generality is the enemy of documentary. The clip where your grandmother says "family was everything to us" is less valuable than the clip where she says "every Sunday morning, without fail, Dad would make pancakes — even when we were so broke we had flour and that was basically it." Specific always beats general.
The length question:
How long should a family documentary actually be? The honest answer: as long as it earns, and not one minute more.
The practical answer: most family documentaries work best between 8 and 25 minutes. Here's why: the audience is your family. They love the subjects. They have enormous tolerance for familiar faces and shared memories. But love doesn't override boredom — a 47-minute film about a holiday gathering will test even the most devoted relatives, because the experience of watching something is fundamentally different from the experience of living it.
A rough guide by type:
- Birthday or holiday film: 6-12 minutes
- Single-day event (graduation, reunion): 10-20 minutes
- Portrait of a family member (grandparent interview): 15-25 minutes
- Multi-year family chronicle: 20-40 minutes (with very tight editing)
The hardest cut you'll make is the one that gets you to the right length. That often means killing footage you're proud of. This is the work.
Transition Decisions: When to Cut, When to Dissolve
Let's talk about transitions — because nothing signals amateur editing faster than bad transition choices, and nothing serves a story more invisibly than good ones.
The cut is the default. One image is replaced instantaneously by another. In professional documentary, probably 95% of all transitions are straight cuts. The cut is invisible when done well; viewers don't experience it as a choice, they simply follow the story.
The dissolve (one image fading into another) signals a passage of time or a shift in perspective. In family documentary, dissolves work beautifully when moving from one time period to another, or when transitioning between separate interview subjects. They create a sense of breathing, of time moving. Used sparingly, they're eloquent. Used constantly, they make your film feel like a PowerPoint presentation.
The fade to black is a chapter break. It says: something ended, something new begins. Use it at genuine structural transitions — moving from childhood memories to adult reflections, from the gathering to the aftermath. Don't use it to hide a cut you can't make work; solve the cut instead.
Never use wipes, star-wipes, barn-door transitions, or any of the whimsical effects that live in the transitions panel of your editing software. These aren't stylistic choices — they're editorial abdications. When you can't find a clean cut and reach for a sparkle-wipe, the film loses a small piece of its dignity. Find the cut.
The J-cut and L-cut are the most powerful transitions you're probably not using. In a J-cut, the audio from the next scene begins before the picture cuts — you hear someone start speaking, then see them. In an L-cut, the audio from the current scene continues over the beginning of the next picture. These overlapping audio transitions are how professional films feel continuous and inevitable rather than choppy and assembled. They're invisible to viewers and worth learning in any editing software.
graph LR
    A[Straight Cut] -->|"Default: 95% of transitions"| B[Invisible, keeps momentum]
    C[Dissolve] -->|"Time passing, shift in subject"| D[Breathing room, period change]
    E[Fade to Black] -->|"Chapter break only"| F[Structural transition]
    G[J-Cut] -->|"Audio leads video"| H[Seamless, pulls viewer forward]
    I[L-Cut] -->|"Audio trails into next scene"| J[Feeling of continuity]
    K[Wipes / Effects] -->|"Never"| L[Amateur signal, avoid always]
Color Correction Basics
Here's the reassuring truth about color correction for family documentary: you don't need to master it. You need to avoid obvious problems and achieve basic visual consistency. That's it.
The two most common issues in family footage are exposure problems (footage that's too dark or too bright) and white balance problems (footage that looks too orange, too blue, or too green because the camera didn't correctly neutralize the light source).
Fixing exposure: Every editing software has a basic exposure or brightness slider. If a clip looks muddy and dark, bring it up. If it's blown out and washed, bring it down. In DaVinci Resolve's Color page, the Lift/Gamma/Gain wheels give you separate control of shadows, midtones, and highlights. In iMovie and Final Cut, simpler exposure controls do the job adequately for most situations.
A useful target for interview footage: skin tones should look natural — not orange, not pale, not overexposed. Use your eyes. If the person looks the way they look in person, you're close enough.
Fixing white balance: If your indoor footage looks orange (tungsten/incandescent light that wasn't corrected in-camera), you need to add some blue. If it looks blue (cloudy outdoor light), you need some warmth. Most editing software has a "temperature" slider that does exactly this. Move it until the whites look white and skin tones look like skin.
Achieving visual consistency: The bigger challenge in family documentary isn't fixing individual clips — it's making clips shot under different conditions look like they belong in the same film. You might have iPhone footage from one camera, DSLR footage from another, and archival photos scanned from prints. These won't naturally match.
The practical approach: correct each clip to look natural and neutral, rather than trying to match all clips to each other. A "neutrally correct" standard is more achievable than a "perfectly matched" standard, and the results are usually good enough that viewers won't notice. If you want to go further, color matching is possible in both Resolve and Premiere — but for most family documentary work, "natural and consistent" is the goal, not "cinematic look."
One color note: Resist the Instagram impulse to apply a heavy stylistic grade to your family footage — strong vintage looks, extreme desaturation, high-contrast "cinematic" grades. These might look striking today and feel dated in five years. Natural color correction ages better than trends.
Audio Mixing in the Edit
By the time you're in the fine cut, you have three layers of audio that need to coexist: interview audio (the voice recordings), natural sound (the ambient audio captured by your camera during B-roll), and music (if you're using any).
The goal is a mix where all three elements are audible and none of them fight each other. Here's a simple approach to levels:
Interview audio is your primary audio. It should be the loudest thing in your mix, typically peaking between -12dB and -6dB. If your viewer can't hear what someone is saying without straining, everything else fails.
Natural sound (nat sound) should be audible under interview audio — not silent, which feels fake, but not competing. Typically 15-20dB below your interview audio when both are playing simultaneously. The sound of the kitchen during a holiday, the murmur of kids playing, the ambient creak of an old house — these sounds make your film feel real and alive. Don't kill them in the mix; just keep them underneath.
Music is the most variable element. Under a quiet interview, music might sit at -25dB to -30dB. Under a pure B-roll sequence with no interview audio, music might come up to -12dB or louder. The technique of pulling music down when someone speaks and bringing it back up in purely visual sections is called "ducking," and most editing software has automatic ducking tools. Use them.
The mono check: When you've got a rough mix, fold everything to mono and listen. If important audio elements disappear or sound unnatural in mono, you have a phase or placement problem to fix. A lot of family watching happens on TVs with single-speaker output, mono compatibility matters more than you think.
A common family documentary audio mistake: over-reliance on music. Music is a powerful emotional manipulator — it tells viewers how to feel. When you lean too hard on it, you're not trusting your footage. If a scene only works with swelling music underneath it, ask honestly whether the footage is strong enough to carry the scene. Often, pulling the music out makes the scene more powerful, not less — because silence and quiet natural sound force the viewer to bring their own emotional response.
Titles, Lower Thirds, and End Cards
Titles are the typographical skin of your documentary. They're also where a lot of family films look unintentionally cheap.
Lower thirds are the name identifiers that appear at the bottom of the frame when an interview subject appears. In broadcast documentary, they're a practical necessity — viewers need to know who's speaking. In family documentary, they serve a slightly different purpose: they ground the film in time and relationship.
A lower third for your grandmother might read: Ruth Kowalski — Grandmother, interviewed November 2024. That simple identifier transforms a home video into a document. Fifty years from now, a great-grandchild watching this film will know exactly who they're seeing and when the interview took place. That context is a gift.
Design principles for titles and lower thirds:
Choose one font family and use it throughout. Simple sans-serif fonts (Helvetica, Futura, Gill Sans) read cleanly on screen. Avoid script fonts that are hard to read. Avoid whatever the default stylized font is in your editing software — it'll mark your film as default.
White or light-colored text on a dark or semi-transparent background reads better than most alternatives. Keep type small enough to look composed rather than urgent. Don't animate titles elaborately — a simple fade on and off is elegant.
Opening titles: Your film needs a title card. Something clean, readable, that gives the film its name. Don't overthink this — the name of the film can be as simple as the person's name and a date. Ruth: A Life Remembered. The Kowalskis, Thanksgiving 2024. The title tells viewers they're about to watch something intentional, not a collection of clips. That framing matters.
End cards: End with something. A final black screen with a simple credit — Filmed and Edited by [Your Name], 2024 — closes the film properly. You can also include a dedication card if this film is made in honor of someone. These small closings give viewers permission to feel something at the end rather than wondering if there's more coming.
The Screening Test: Evaluating Your Own Cut
Here's the hardest truth about editing your own family footage: you cannot objectively evaluate it. You are too close to the subjects, too invested in the story, too aware of the craft decisions you made. You watch the footage and see the intention behind it; a viewer watches and sees only the result.
This is not unique to you. Professional editors use specific techniques to achieve the distance necessary to evaluate their own work honestly. These techniques work for family documentary too.
The overnight rule: After completing your fine cut, don't watch it again until the next day. The editorial brain needs a rest before it can evaluate clearly. Work done today will reveal its flaws and strengths with startling clarity tomorrow morning.
The stranger test: Find someone who has no relationship to the subjects in your film. Show them your cut and watch them watch it — don't explain anything, don't contextualize, don't apologize for rough sections. Observe when they lean forward (good) and when they check their phone (bad). Ask two questions afterward: "Was there a moment where you got confused?" and "Was there a moment where you felt something?" The answers will tell you more than any amount of self-analysis.
The sound-only pass: Play your final cut with the screen turned away from you. Just listen. If you hear sections where you start to tune out, those are the sections that need tightening — the pictures were doing more work than the story to hold attention.
Common self-evaluation blind spots:
You'll over-protect footage with personal significance. A shot of your grandmother's hands making pierogies might be the most beautiful thing you've ever filmed, and you'll want to hold on it for twenty seconds. Your audience will appreciate it for eight. Cut to twelve as a compromise, then cut to nine when you're being honest.
You'll under-protect emotionally difficult moments. If a family member said something raw and true — something that required courage to say on camera — you might be tempted to cut it because it feels too exposed. These are often the moments that make a film real and lasting. Be careful about editing for comfort rather than truth.
You'll mistake familiarity for quality. You've watched your footage forty times in the editing process. You know what's coming. This destroys your ability to feel pacing. The overnight rule helps. So does watching at a different time of day than you usually edit.
Export Settings for Different Destinations
Your film is done. Now you need to get it out of your editing software and into the world in a form that will actually play correctly, look good, and be preserved properly.
Export settings can feel like an impenetrable wall of technical acronyms. Here's a plain-language guide to what matters.
The master export: your archive file
Before you export anything for sharing, export a high-quality master file. This is your archive — the version you store on a hard drive and never delete. For the master:
- Format: H.264 or H.265 (HEVC), or ProRes if your software supports it
- Resolution: Same as your source footage (usually 1080p or 4K)
- Quality: Maximum or near-maximum bitrate
- Audio: Stereo, 48kHz, 16-bit minimum
This master file is large. That's fine. It's your original. Every other export is derived from it.
Private family sharing (direct download, email, AirDrop)
For sharing with family members who'll watch on their phones, tablets, or TVs:
- Format: H.264
- Resolution: 1080p (even if you shot 4K — 4K files are unnecessarily large for casual sharing)
- Frame rate: Match your source footage (typically 24fps, 25fps, or 30fps)
- File size target: For a 15-minute film, aim for 500MB to 1.5GB
YouTube (private or public)
YouTube's compression algorithms work best when you give them something to work with. Their recommended upload format:
- Format: H.264 or H.265
- Resolution: 1080p or 4K
- Frame rate: Match your source
- Audio: AAC, 256kbps
Upload the highest quality file you can — YouTube will create its own compressed versions for streaming, and starting from a better source gives you better results. Set the video to Unlisted (viewable only by people with the link) for private family sharing rather than Public.
Vimeo (for more cinematic presentation)
Vimeo compresses less aggressively than YouTube and tends to handle color-graded footage better. If you've done color work you care about, Vimeo is worth the better presentation. Their recommended settings are similar to YouTube's, with H.264 or H.265 at the highest bitrate you can provide.
Archival storage (long-term preservation)
This is covered in depth in Section 12, but the export principle is simple: archive at the highest quality possible, in a format that's likely to be readable in twenty years. H.264 in an MP4 container is currently the best balance of quality, file size, and long-term format stability. Avoid proprietary formats that require specific software to play.
graph TD
    A[Finished Fine Cut] --> B[Export Master File\nHigh Quality H.264/ProRes]
    B --> C[Archive on External Drive\n+ Cloud Backup]
    B --> D[Export for Sharing]
    D --> E[Family Direct Share\n1080p H.264, ~1GB]
    D --> F[YouTube Private\n1080p/4K H.264]
    D --> G[Vimeo\nH.264, High Bitrate]
    D --> H[DVD/Physical\nIf Required]
The Edit as Intentional Act
Here's what ties all of this together: every decision in the edit is an act of intention, and intention is the whole thesis of this course.
When you decide to start your film with your grandmother's voice rather than her face, you're making a choice about how this story begins. When you hold on the empty kitchen table for two beats after the last interview ends, you're making a choice about what the film feels at its close. When you cut away from your dad's face in the moment he gets emotional, or choose to stay — you're deciding what kind of film this is, how much truth it can hold, who it's for.
None of this requires expensive software or a film school degree. It requires you to sit with your footage, listen to what it's telling you, and make decisions in service of a story that only you can tell. The people you've filmed have given you something irreplaceable. The edit is how you honor that gift.
Professional documentary editors speak of editing as discovering the film that was always inside the footage — not imposing a structure on raw material, but listening until the structure reveals itself. That process is available to you. It just requires patience, a willingness to cut things you love, and the discipline to keep asking whether every single choice is serving the story.
Your family is the most accessible, most emotionally available subject you will ever have. The edit is where you make that access into something that lasts.
A Note on Perfectionism and Finishing
One last thing, and it's important enough to say plainly: the enemy of finished family documentaries isn't bad footage or limited skills. It's perfectionism.
Professional editors have a phrase: "Films aren't finished, they're abandoned." There is always another cut to make, another clip that could be better, another section that could be tighter. At some point you have to decide that the film is done — not because it's perfect, but because it's good enough to be true, and the alternative to "good enough" is "never shared with anyone."
A film that's 85% of what you imagined it could be, completed and shared with your family this year, is infinitely more valuable than a film that's 95% of what you imagined but still sitting unfinished on a hard drive. This is not an excuse for carelessness — it's a reminder that completion is itself an act of love toward the people the film is for.
Export the file. Share it. Let them watch. That's what you made it for.
Only visible to you
Sign in to take notes.