How to Use VLOOKUP and Cross-Sheet References in Google Sheets
In the previous section, we explored how functions like SUM, AVERAGE, and IF follow a consistent pattern: take inputs, perform a defined operation, return an output. That mental model is the key to unlocking what comes next. Now we're going to meet a function that uses that same structure to solve one of the most common real-world spreadsheet challenges: finding information in one table and pulling it into another.
There's a moment that every spreadsheet user eventually hits. You've got a list of orders on one side of your screen, and a price list somewhere else entirely. You need to match them up — find the price for each product, automatically, without copying and pasting 200 rows by hand. Your data knows the answer. You just don't know how to ask it. This is the lookup problem, and it's one of the most common things real people actually need spreadsheets to do. Solving it is what VLOOKUP is built for.
Fair warning: VLOOKUP has a bit of a reputation. It's the function that makes beginners nervous and makes intermediate users feel like experts. But here's the thing — once you see the logic behind it, you'll realize it's just another function following the same input-operation-output pattern you've already mastered. Let's take it apart.
VLOOKUP takes four arguments. Each one tells the function a different piece of information. Get them all right, and you've got your answer. Each does a very specific job, and if you get any of them wrong, the whole thing falls apart. Let's go through them one at a time, in plain English.
graph LR
    A["=VLOOKUP("] --> B["search_key,"]
    B --> C["range,"]
    C --> D["index,"]
    D --> E["is_sorted)"]
    B --- F["What you're looking for"]
    C --- G["Where to look"]
    D --- H["Which column to return"]
    E --- I["Exact or approximate?"]
Argument 1: search_key — What You're Looking For
The search_key is the value you want to find. In our example, that's the product code — MGET-12, or whatever's in cell B2 of your sales log.
You can type a value directly (like "MGET-12"), but almost always you'll use a cell reference instead. That way, when you copy the formula down to the next row, it automatically looks up the product code for that row.
So in practice, your formula starts like this:
=VLOOKUP(B2, ...
Argument 2: range — Where to Look
The range is the table where your answer lives — the price list in our example. You give VLOOKUP the full range of that table.
Here's the rule that trips almost everyone up the first time they use this function: the column you're searching must be the leftmost column of your range. VLOOKUP always searches down the first column of whatever range you give it. If your search column isn't first, it will fail. This is probably the single biggest gotcha with VLOOKUP, so it's worth saying twice.
So if your price list lives in columns A through C (Product Code, Product Name, Price), you'd write:
=VLOOKUP(B2, A2:C10, ...
VLOOKUP will look down column A (the first column in your range) for the product code. Once it finds a match, it will retrieve information from other columns in that same row.
Warning: If the column you want to search is NOT the first column in your range, VLOOKUP cannot work directly. This is one of VLOOKUP's most significant limitations. We'll come back to this at the end of the section.
Argument 3: index — Which Column to Return
Once VLOOKUP finds the matching row, the index tells it which column from your range to return. You count from the left — column 1 is the search column itself, column 2 is the next one, and so on.
In our price list (Product Code, Product Name, Price), the price is in the third column. So the index is 3:
=VLOOKUP(B2, A2:C10, 3, ...
If you wanted the product name instead of the price, you'd use 2. The index is just counting across the columns of your range, starting from the left edge.
Tip: A common mistake is counting columns from the start of the sheet instead of the start of your range. If your price list starts in column D, the first column of your range is still index
1. Always count from the left edge of your range, not the sheet.
Argument 4: is_sorted — Exact or Approximate Match?
The last argument controls whether VLOOKUP does an exact match or an approximate one. It accepts either TRUE or FALSE.
- FALSE means exact match. This is what you want almost all the time. VLOOKUP will find the row that exactly matches your search key, or return an error if it can't.
- TRUE means approximate match. This is designed for situations where you're looking up a value that falls within a range, like tax brackets or shipping tiers. It only works correctly if your first column is sorted in ascending order.
For everyday use — looking up product codes, names, IDs, anything specific — always use FALSE.
=VLOOKUP(B2, A2:C10, 3, FALSE)
A Complete Worked Example
Let's make this concrete. You have a sheet called "Orders" and a price list that sits a few columns over (or on another sheet — we'll get to that). The setup:
Price List (columns E–G, starting row 2):
| E | F | G | |
|---|---|---|---|
| 1 | Product Code | Name | Price |
| 2 | BKPK-07 | Canvas Backpack | 45.00 |
| 3 | HDPH-03 | Wireless Headphones | 89.99 |
| 4 | MGET-12 | Magnetic Phone Mount | 12.50 |
Sales Log (columns A–D):
| A | B | C | D | |
|---|---|---|---|---|
| 1 | Order ID | Product Code | Qty | Price |
| 2 | 1001 | MGET-12 | 3 | |
| 3 | 1002 | BKPK-07 | 1 | |
| 4 | 1003 | MGET-12 | 5 |
In cell D2, you want to look up the price for the product in B2. Here's the formula:
=VLOOKUP(B2, $E$2:$G$4, 3, FALSE)
Walk through it:
B2— look for whatever's in cell B2 (which is "MGET-12")$E$2:$G$4— search the price list table (more on those dollar signs in a moment)3— return the value from the third column of that range (Price)FALSE— find an exact match
VLOOKUP scans down column E until it finds "MGET-12", then hops over to the third column of the range (column G) in that same row, and returns 12.50. ✓
Why Absolute References Matter So Much Here
Notice those dollar signs in $E$2:$G$4. Those are absolute references, as explained by W3Schools, and in VLOOKUP they're not optional — they're essential.
Here's why. When you copy a formula down a column, Google Sheets adjusts all the cell references relative to the new position. That's great for the search_key (you want B2 to become B3, B4, etc., as you copy down). But you do not want your price list range to shift. If you wrote E2:G4 without dollar signs and copied the formula down, row 3's formula would look for prices in E3:G5 — a range that doesn't include the first product anymore.
Making the range absolute with $E$2:$G$4 locks it in place. No matter which row you copy the formula to, it always looks in the same price list.
Remember: In VLOOKUP, always lock your range with absolute references (
$). The search key should stay relative; the lookup table should stay fixed.
In Google Sheets, the F4 key does not cycle through reference styles. Users must manually type dollar signs ($) to create absolute or mixed references, or use keyboard shortcuts like Ctrl+Shift+F4 in some versions, but F4 alone does not perform this function in Google Sheets (it's an Excel feature).
Handling #N/A Errors with IFERROR and IFNA
Type your formula, hit Enter, and see #N/A staring back at you. Don't panic. #N/A means "value not available" — VLOOKUP looked for your search key and couldn't find it in the first column of your range.
Common reasons this happens:
- A typo in the product code (uppercase vs. lowercase matters sometimes; extra spaces definitely matter)
- The search key genuinely doesn't exist in your price list
- Your range doesn't actually cover all the rows you think it does
Sometimes #N/A is the right answer — it's telling you something is missing that should be there. But when you want to display something friendlier, you can wrap your VLOOKUP in IFERROR:
=IFERROR(VLOOKUP(B2, $E$2:$G$4, 3, FALSE), "Price not found")
IFERROR checks whether the formula inside it produces an error. If it does, it displays your custom message instead. If it doesn't, it shows the normal result.
Alternatively, IFNA is a more specific version that only catches #N/A errors (and lets other error types show through, which can be useful for debugging):
=IFNA(VLOOKUP(B2, $E$2:$G$4, 3, FALSE), "Price not found")
Which one to use? IFNA is generally the better habit — it lets you know if something else goes wrong with your formula, while still handling the "not found" case gracefully.
Cross-Sheet References: Pulling Data from Another Tab
Real spreadsheets rarely keep everything on a single sheet. You might have January sales on one tab, February on another, and a summary sheet pulling from both. Or your price list might live on its own "Reference" tab where you can update it without cluttering your main data.
To reference a cell or range from another sheet, Google Sheets uses this syntax:
SheetName!CellAddress
The sheet name comes first, then an exclamation mark (!), then the cell reference. For example, if your price list is on a sheet called "Prices" in cells A2:C10, you'd reference it as:
Prices!A2:C10
And your VLOOKUP would become:
=VLOOKUP(B2, Prices!$A$2:$C$10, 3, FALSE)
If your sheet name contains spaces, wrap it in single quotes:
=VLOOKUP(B2, 'Price List'!$A$2:$C$10, 3, FALSE)
You can either type this manually (once you know the syntax, it's fast), or let Google Sheets write it for you: start typing your formula, then when you get to the range argument, click the "Prices" tab and select the range there. Google Sheets will automatically write the cross-sheet reference for you.
graph TD
    A["Summary Sheet"] --> B["=VLOOKUP(B2, 'Prices'!A2:C10, 3, FALSE)"]
    B --> C["Prices Sheet"]
    C --> D["Column A: Product Code"]
    C --> E["Column B: Product Name"]
    C --> F["Column C: Price"]
    D -->|"Match found in A4"| G["Return value from Column C, Row 4"]
    G --> H["Result: $12.50"]
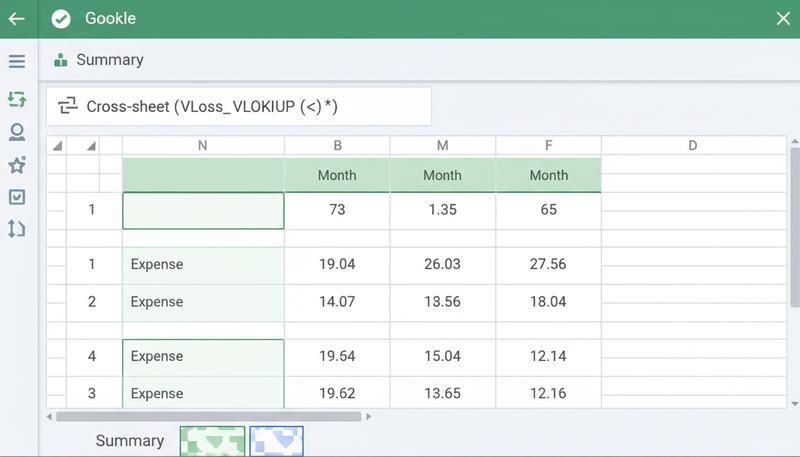
Practical Use Case: A Summary Sheet That Pulls from Multiple Tabs
Here's a real-world scenario you might actually build. Imagine you're tracking monthly expenses. You have three tabs: "January", "February", and "March". Each has an identical structure: a list of categories (Rent, Groceries, Transport) and their totals for that month.
On a fourth "Summary" tab, you want a simple table showing each category's total for each month — without manually copying anything.
For a simple cross-sheet reference (not a full VLOOKUP), you'd just write:
=January!B5
This pulls whatever's in cell B5 of the January sheet — no lookup needed if the data is already organized identically across sheets.
For something more dynamic — say, pulling a specific category's total from a sheet that isn't perfectly organized — you'd use VLOOKUP with the cross-sheet range syntax:
=VLOOKUP("Groceries", January!$A$2:$B$10, 2, FALSE)
This looks for "Groceries" in the January sheet and returns the value from the second column.
The beauty of this approach is that when you update the January sheet (say, you realize you forgot a receipt), the Summary sheet updates automatically. Your summary becomes a live view of your data, not a snapshot frozen in time.
The Limitations of VLOOKUP — and What Comes Next
For all its usefulness, VLOOKUP has some genuine frustrations that are worth knowing about before you hit them in the wild:
It can only search left-to-right. The search column must always be the first column in your range, which means you can never look up a value to retrieve something from a column that's to the left of your search column. This forces you to sometimes reorganize your data just to make VLOOKUP work.
It returns the first match only. If your lookup table has duplicate values in the search column, VLOOKUP stops at the first one it finds. The others are ignored.
It's vulnerable to column insertions. If you add a column to your lookup table, the index number in your VLOOKUP formulas will silently point to the wrong column. This is a sneaky bug that's caused real-world headaches.
When you're ready to graduate beyond these limitations, two functions are worth knowing about:
- XLOOKUP — the modern replacement for VLOOKUP, available in Google Sheets. It can search in any direction, returns the first or last match, and handles "not found" cases more gracefully without needing IFERROR. The syntax is cleaner too.
- INDEX/MATCH — a combination of two functions that together do what VLOOKUP does, but without the left-to-right limitation. Slightly more complex to write, but more flexible and more robust for large, complex datasets.
For now, VLOOKUP will handle the vast majority of lookup problems you'll encounter as a beginner. It's genuinely powerful, it's widely understood, and learning its logic means you're already halfway to understanding XLOOKUP and INDEX/MATCH when you're ready for them.
Think back to the thesis of this whole course: spreadsheets are a universal language for organizing, analyzing, and communicating information. VLOOKUP is one of the most vivid examples of that language in action. Instead of hunting through a price list manually every time you make a sale, you're teaching your spreadsheet a relationship — "product codes connect to prices" — and letting it apply that knowledge everywhere at once. You're not just calculating; you're building a small but real system. That's the shift that turns spreadsheets from a recording tool into a thinking tool.
Only visible to you
Sign in to take notes.