Best Recording Equipment for Family Oral History
Choosing Your Tools: Recording Equipment for Every Budget and Skill Level
You now have the tools to ask questions that genuinely unlock stories — to listen deeply, to create space, and to resist the impulse to lead or complete what your narrator is searching to say. That's the heart of a meaningful oral history. But before you can step into the room with your grandmother, your uncle, or your aging neighbor, you need to make one practical decision that will shape everything else: what are you going to record on?
Let's get something out of the way right now: gear anxiety is one of the most common reasons people never start their family oral history project. They tell themselves they'll do it once they figure out the right microphone, or once they've saved up for a decent recorder, or once they understand the difference between WAV and MP3 files. Months pass. Sometimes years. And then one day, the chance is gone. The truth is both more reassuring and more demanding than that: the equipment matters, but far less than you think, and far less than the decision to simply begin. A $0 setup — the smartphone already in your pocket — can produce a recording that will be treasured for generations. A $200 setup can produce something that sounds genuinely archival-quality. And almost any setup, if you understand its limitations and work within them, beats waiting for the perfect moment that never comes. This section will walk you through everything you need to know to make a confident gear decision and actually start.
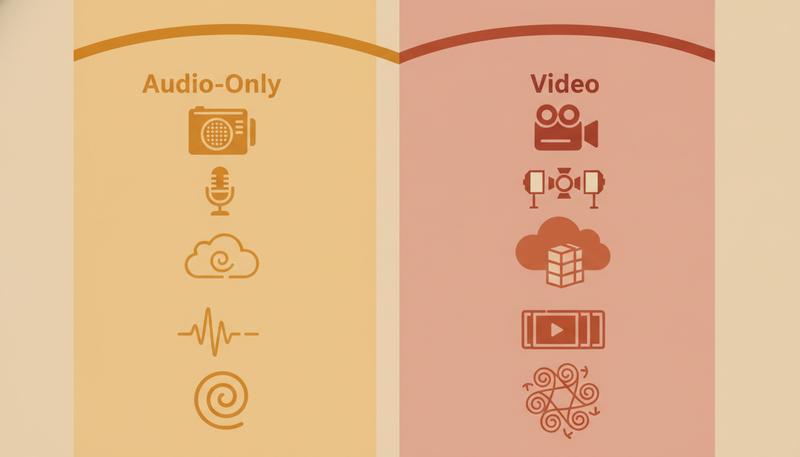
Audio Versus Video: A Strategic Choice
Here's the first fork in the road: are you recording audio only, or video?
Video is seductive. It feels more complete. You'll capture not just what your narrator says but how they look when they say it — the expressions, the gestures, the way they might get up to show you something from their house or pull out a photograph. There's real value in that. The problem is that video introduces complexity and creates technical challenges that often backfire.
Video files are enormous. A one-hour interview in decent quality might consume 10–50 GB of storage depending on format and resolution. A one-hour audio file in archival WAV format might be 1–2 GB. When you're thinking about backing this up, sharing it, and storing it for fifty years, that difference becomes significant.
There's another problem, one that most people don't anticipate: video makes audio quality feel non-negotiable. In an audio-only recording, acceptable audio is just acceptable audio — something the listener tolerates because they're expecting to listen. But the moment something looks like video, viewers expect it to sound like video too. Bad audio in a video is painfully obvious and distracting in a way that bad audio in an audio-only recording simply isn't.
Here's the honest take from people who've done this work for years: for most family oral history, audio should be your primary focus. If you want to capture a few minutes of video at the beginning or end of the session — your grandmother walking through her kitchen, pointing at photographs, gesturing as she describes something — that's lovely supplementary material. But the archive, the thing you'll transcribe and preserve and return to across decades, is the audio.
That said, smartphones have made video so easy that many people do record video by default, and if that's what gets you to actually hit record, it's the right choice. Just commit to making the audio genuinely good, and we'll talk extensively about how to ensure that.
Why Audio Quality Matters More Than You Expect
Here's something counterintuitive: in oral history work, audio quality matters more than video quality. This is true even when you're recording video.
Think about what we actually do with these recordings. We listen back to them. We transcribe them. We share clips with family members who are trying to hear what great-uncle Milos sounded like when he described arriving at Ellis Island. The entire historical content of an oral history recording lives in the audio track. The video, however moving and valuable, is contextual. The words are the record.
Poor audio creates problems that ripple forward through decades. Transcription becomes difficult, which means errors creep in. Sections become inaudible — sometimes critical sections, sometimes the quieter emotional moments when a narrator drops their voice. The recording becomes less accessible to people with hearing loss. Future technologies that can search, translate, or analyze audio recordings will struggle with low-quality source material.
Baylor University's Institute for Oral History, one of the country's leading centers for this work, emphasizes the importance of choosing the right recording equipment as a fundamental step before the interview begins — not an afterthought. This is a professional community that has spent decades watching recordings degrade or become unusable, and they've learned to take audio quality seriously from the start.
So what does "good audio quality" actually mean? Three main factors:
Signal-to-noise ratio — the ratio of the narrator's voice (the signal you want) to background noise you don't want. HVAC systems, refrigerators, traffic, other people moving through the house, a fan — all of this is noise, and all of it competes with the voice. Better microphones, placed closer to the narrator, improve this ratio dramatically.
Clarity and frequency response — does the recording capture the full range of the human voice, including the warmth of low tones and the crisp definition of higher consonants? Cheap microphones tend to emphasize certain frequencies and roll off others, making voices sound tinny or muffled.
Absence of distortion — if the recording level is set too high, louder moments will distort into clipping (a harsh, broken sound that cannot be repaired in post). Setting levels correctly before you begin is critical.
Archival Standards in Plain English
You'll encounter phrases like "24-bit / 96kHz WAV" in oral history literature and feel your eyes glaze over. Let's make sense of this.
A digital audio recording is made by taking thousands of "snapshots" of sound per second, each snapshot measuring the amplitude (loudness) of the sound wave. Two numbers describe this:
Sample rate (the "kHz" number) — how many snapshots per second. CD quality is 44,100 samples per second (44.1 kHz). Archival standard is 96,000 samples per second (96 kHz). Higher is better, capturing more of the full sound. For oral history, even 44.1 kHz is genuinely fine — archivists recommend 96 kHz because they're thinking about the long term, where higher-resolution source material gives future technologies more to work with.
Bit depth (the "bit" number) — how precisely each snapshot measures the sound. 16-bit gives you 65,536 possible values for each measurement. 24-bit gives you 16,777,216. More precision means better capture of quiet sounds and more headroom before loud sounds distort. The archival standard is 24-bit.
File format (WAV vs. MP3) — this is the most practically important distinction. According to the NPS oral history guidelines, "recordings created in highly compressed formats such as .mp3 are not as stable as those created as .wav files." MP3 is a lossy format, meaning it achieves its smaller file size by permanently discarding audio information the human ear doesn't notice easily. WAV is lossless — it keeps everything. For an archive meant to last decades, WAV is non-negotiable. MP3 is fine for sharing and listening, but archive in WAV.
graph TD
    A[Audio Recording Decision] --> B{Which Format?}
    B --> C[WAV - Lossless]
    B --> D[MP3 - Compressed]
    C --> E[Archive Copy\n24-bit / 96kHz WAV]
    C --> F[Standard Copy\n16-bit / 44.1kHz WAV]
    D --> G[Sharing Copy Only\nNever Archive as MP3]
    E --> H[Store + Backup Forever]
    F --> H
    G --> I[OK for listening/sharing]
The practical takeaway: record in WAV if your device allows it, and save WAV as your archival copy. Convert to MP3 only when you need a smaller file for sharing or storage. Never let MP3 be the only copy you have.
The Smartphone: A Legitimate Oral History Tool
Your smartphone is a genuinely capable oral history recording device. Not a compromise. Not a last resort. A legitimate tool — with specific limitations you need to understand and work around.
Modern smartphones record audio at quality that would have required professional equipment a decade ago. The internal microphones are omnidirectional (they pick up sound from all directions), reasonably sensitive, and connected to processors that do significant real-time noise reduction. For recording a conversation across a kitchen table in a quiet room, a modern iPhone or Android device is entirely adequate.
Using your smartphone well:
The default voice memo apps (Voice Memos on iPhone, Recorder on Android) work fine for this purpose. On iPhone, Voice Memos records in a compressed format by default — go to Settings > Voice Memos > Audio Quality and switch it to Lossless if you want better quality. On Android, some devices offer WAV recording in their native apps; if not, third-party apps like Hi-Q MP3 Voice Recorder or RecForge II offer more control.
Place the phone closer to the narrator than you think you need to. The standard mistake is leaving the phone on the table between two people, which picks up table sounds, is equidistant from both voices, and is farther from both than it should be. A phone placed 12–18 inches from the narrator's mouth, angled toward them, produces dramatically better results.
The critical limitation: the internal microphone.
Built-in smartphone microphones are omnidirectional by design — they're meant to capture everything around you. In an interview setting, "everything" includes the refrigerator cycling on in the kitchen, a car outside, the interviewer shifting in their chair, and the soft hiss of the HVAC system. These background sounds are survivable in a controlled environment, but in anything less than a very quiet room, they significantly degrade the recording.
The solution — and we'll return to this — is adding an external microphone, which transforms a smartphone from a capable device into a surprisingly professional one.
Airplane mode: a detail that matters. Put your phone in airplane mode before you start recording. Incoming calls, notifications, and even the slight interference from cellular activity can corrupt audio in annoying ways. You'll also want to make sure it's charged to at least 50% and that you've disabled any timer that would dim or lock the screen during recording.
Dedicated Audio Recorders: When They're Worth It
A dedicated digital audio recorder is a handheld device designed specifically to capture audio. The most commonly recommended brands among oral history practitioners include Zoom, Tascam, Sony, and Marantz. The NPS recommends practitioners favor these brands precisely because they're purpose-built for this work.
Why consider a dedicated recorder over your smartphone?
Better built-in microphones. Even entry-level dedicated recorders like the Zoom H1n (typically $50-$70) have high-quality stereo condenser microphones built in that outperform most smartphone internal mics. The capsules are larger, more sensitive, and optimized for capturing speech clearly.
Direct WAV recording. Dedicated recorders typically record in WAV format at archival-standard settings (24-bit / 96kHz) without any additional configuration. This is their default purpose.
Physical controls that are easy to use under pressure. When you're managing a conversation with a 90-year-old about their childhood, you don't want to be navigating app interfaces. A dedicated recorder has a physical record button you can press with confidence, physical level meters you can glance at, and physical playback controls. There's something to be said for simple, dedicated hardware when the recording itself is what matters.
Battery life. Dedicated recorders can run for 10–15 hours on standard AA batteries. They don't receive calls, run apps, or need to check email. They just record.
XLR inputs for professional microphones. Mid-range recorders (Zoom H5, H6, Tascam DR-40X) have XLR inputs that accept professional-grade microphones, which opens up significantly better audio quality if you want to invest there.
The honest calculus: if you're going to do this more than once — if you're planning a serious family oral history project, interviewing multiple family members over time — a dedicated recorder at the $70–150 price point is a worthwhile investment. If this is a one-time effort or you truly just want to capture one interview with a family member, your smartphone plus a $30 external microphone is a perfectly respectable setup.
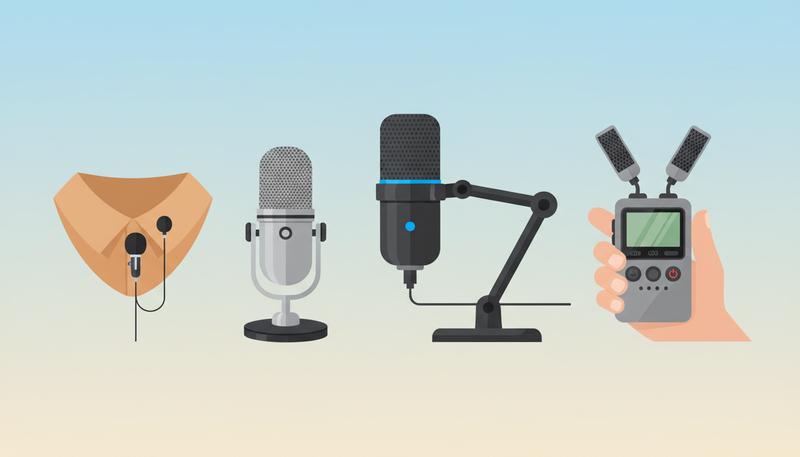
Microphones Explained Without the Jargon
Microphones intimidate people, partly because there are so many types and so much technical vocabulary surrounding them. Here's what you actually need to know.
Built-in microphones The microphones inside your phone or recorder. Generally omnidirectional (pick up sound from all sides) and optimized for convenience rather than precision. Perfectly adequate for quiet environments; struggle with background noise.
Lavalier microphones (clip-on mics) The small microphones you see clipped to a TV news anchor's lapel. They clip to clothing, close to the narrator's mouth, which dramatically improves signal-to-noise ratio because the mic is close to the source. They're excellent for capturing a narrator's voice clearly. Drawbacks: attaching them requires getting physically close to the narrator (which some people find uncomfortable), women's clothing often doesn't have convenient attachment points, and fabric rubbing against the microphone capsule can create distracting noise. They also only capture one person well — if you need to hear both narrator and interviewer, you'd need two lavalieres. Budget lavaliers (RØDE SmartLav+, ~$60; DJI Mic Mini, ~$100) are excellent tools that plug directly into a smartphone.
USB microphones Condenser microphones with a built-in audio interface that connect directly to a computer via USB. Not suitable for mobile recording, but excellent for conducting interviews in a fixed location where you're recording to a laptop. Brands like Blue Yeti and Audio-Technica AT2020USB+ offer genuinely professional sound quality for $100–150. The limitation is that you need a computer and a relatively stationary setup.
Handheld condenser microphones What most people picture when they say "microphone." In oral history, these are typically placed on a small desktop stand or tripod between the narrator and interviewer, 12–18 inches from the narrator's face. Condenser microphones are the professional standard for capturing speech; they're sensitive, capture a full frequency range, and require a small amount of power (called "phantom power") from the recording device. Models from brands like RØDE and Audio-Technica in the $50–100 range produce excellent results.
Shotgun microphones Highly directional microphones that reject sound from the sides and capture primarily what they're pointed at. Used extensively in filmmaking and journalism. For a one-on-one interview in a room with background noise, a shotgun mic mounted on a camera pointing at the narrator can produce very clean audio. For family oral history, these are more specialized than most people need — but worth knowing about if you're recording video and the camera is 3–5 feet from the narrator.
The One Piece of Gear Most People Overlook
If I could give you one single piece of advice about gear — one insight from people who have recorded hundreds of hours of oral history — it would be this: add an external microphone to whatever you're recording with.
This is the single highest-impact gear decision you can make. A smartphone with a $30–80 external lavalier microphone will produce better results than a dedicated recorder using only its built-in mics, in most real-world interview environments.
Here's why this matters so much in practice: the gap between "the narrator is 3 feet from the microphone" and "the narrator is 10 inches from the microphone" is enormous in terms of audio quality. Physics dictates that sound intensity drops with the square of distance. Every foot you add between the microphone and the narrator's mouth dramatically increases the ratio of background noise to voice. An external microphone attached to clothing, or placed on a small stand right in front of the narrator, closes that distance and changes everything.
Practical options at different price points:
- $25–40: RØDE SmartLav+ (plugs directly into smartphones, surprisingly excellent)
- $50–70: Zoom H1n built-in stereo mics (good entry-level dedicated recorder with strong built-in mics)
- $80–120: DJI Mic Mini wireless lavalier system (records to the transmitter itself as backup, excellent quality)
- $100–150: RØDE VideoMicro (compact directional mic that mounts on a camera or phone, great for video)
When you listen to a recording made with a good lavalier microphone versus an internal phone microphone in the same room, the difference is immediately obvious. The lavalier recording sounds present, clear, warm. The phone recording sounds like it was captured from across the room — because acoustically, it was.
Budget Tiers: What You Can Do With Different Investments
Let's make this concrete. Here are three realistic setups at three price points, with honest assessments of each.
The $0 Setup
What you need: The smartphone you already own, plugged in or fully charged, in airplane mode.
What you get: A perfectly usable oral history recording if you're in a quiet room. Place the phone 12–18 inches from the narrator, make sure the room has no background noise, and use the native voice memo or recorder app. On iPhone, switch to lossless audio in settings.
The limitations: Sensitive to background noise. The omnidirectional mic picks up everything. In anything less than a very quiet room, you'll hear the refrigerator, the HVAC, outdoor sounds. You'll also have no backup if the phone fails.
Who this is right for: Someone doing this once, on short notice, or who genuinely cannot spend any money. The $0 setup is infinitely better than not recording at all.
The $50 Setup
What you need: Your smartphone plus a budget lavalier microphone ($25–40, like the RØDE SmartLav+ or the Movo PM10) and a small desktop tripod or clip to position the phone.
What you get: A significant quality upgrade. The lavalier mic placed on the narrator's clothing captures their voice from just inches away, dramatically reducing background noise relative to the voice. This is the setup I'd recommend to most people doing this for the first time who want results they'll be genuinely proud of.
Bonus: The RØDE SmartLav+ records in a compatible format on most smartphones, and at this price point you're investing in something reusable across many interviews.
Who this is right for: Most people. This is the sweet spot of cost and quality for family oral history work.
The $200 Setup
What you need: A dedicated audio recorder like the Zoom H5 (~$140–160) paired with a small condenser microphone on a tabletop stand, or a wireless lavalier system like the DJI Mic Mini (~$130, though you can catch sales).
What you get: Something close to professional archival quality. WAV files at 24-bit/96kHz. A physical recorder with level meters you can monitor in real-time. A backup recording option (many recorders have dual recording modes). A setup that sounds unmistakably clear and professional.
Who this is right for: Anyone planning multiple interviews, anyone with a narrator whose voice is soft or difficult to capture, anyone who wants to share or publish the recordings beyond family, anyone who simply wants to know they did this as well as it could be done.
graph LR
    A[Budget] --> B[$0 Setup]
    A --> C[$50 Setup]
    A --> D[$200 Setup]
    B --> E[Smartphone Only\nQuiet room required\nUsable quality]
    C --> F[Smartphone + Lavalier Mic\nGood quality\nBackground noise handled]
    D --> G[Dedicated Recorder + Mic\nArchival quality\nProfessional results]
Redundancy: Always Record on Two Devices
This advice sounds paranoid until the day it saves you. Always record on at least two devices simultaneously.
Equipment fails. Apps crash. Someone accidentally hits stop. A battery dies. In decades of oral history practice, these things happen with enough regularity that every working practitioner treats redundancy not as a nice-to-have but as a fundamental rule.
The simplest redundancy is to run your primary setup (whatever it is) plus your phone recording simultaneously. If your primary is a dedicated recorder, start your phone's voice memo app as a backup. If your primary is your phone, borrow a family member's phone as a backup. The cost is zero. The insurance value is incalculable.
Place your backup recorder slightly differently than your primary — closer or farther, at a different angle. If there's a technical problem with one recording, the other is your lifeline. As the Boston Public Library's oral history equipment guide notes, preparing properly with equipment is a foundational practice that the professional oral history community takes seriously for exactly this reason.
I once conducted a three-hour interview with a 96-year-old woman who described her experience as a nurse in the South Pacific during World War II. My primary recorder malfunctioned in the final hour — I didn't know until playback — and lost the last forty-five minutes. My phone backup captured it all. I've never gone into an interview without two devices recording since.
Video Recording Basics: When You Want to Capture the Visual
If you've decided that video adds value for your project — you want to see your narrator's expressions, capture them with their photographs, or create something to screen at a family gathering — here's what you need to know to do it well.
Smartphone video is genuinely capable. Modern iPhones and Androids shoot video quality that would have required professional cameras a decade ago. For family oral history purposes, a smartphone in 1080p is entirely sufficient; there's no need for 4K for this application. The critical issue — again — is audio. Smartphone video audio captured by the built-in microphone from 3–4 feet away is where recordings most commonly disappoint. Use an external microphone with your smartphone video, and suddenly your footage sounds as good as it looks.
Entry-level camcorders and mirrorless cameras offer benefits over smartphones primarily in optical zoom (useful if you need to shoot from a distance to make the narrator comfortable), better low-light performance, and more stable footage with a proper tripod. Models in the $300–600 range from Sony, Canon, and Panasonic serve family oral history well. But the investment is only worthwhile if you're committed to doing this seriously across multiple projects.
Framing basics: Position your narrator so the camera is roughly at eye level, and make sure you're not shooting them backlit against a window (a common mistake that turns the subject into a silhouette). Soft natural light from a window to the side of the narrator is genuinely beautiful. Overhead fluorescent light is harsh and aging. A single inexpensive LED panel light ($30–60) pointed at the narrator from the side can transform the quality of your footage.
For most family oral history work, I'd suggest this compromise: set up your primary audio recording, then also record video on a phone mounted on a small tripod. The phone video is your bonus — the archival record is still the audio. If the video is great, wonderful. If it's merely adequate, you still have the audio.
Testing Your Setup Before the Real Interview
Never sit down with your narrator and press record for the first time simultaneously. Test your setup in advance — ideally a day or two before the interview, and again in the actual room on the day of.
Run a five-minute test recording with someone willing to talk while you play with settings. Play it back through headphones (always use headphones for monitoring; speakers in a room mask problems your headphones will catch). Listen for:
- Background noise: Can you hear the refrigerator? Traffic? HVAC? Address these before the interview by choosing a different room, unplugging the fridge temporarily, or adjusting your microphone placement.
- Level/volume: Is the voice clear and present without distorting? If too quiet, move the microphone closer or increase your input gain. If distorting (a harsh, clipping sound on loud words), lower the gain.
- Clarity: Does the voice sound warm and natural, or tinny and hollow? Tinny often means the microphone is too far away or there's too much room echo (hard surfaces reflecting sound). Hollow or boxy often means you're in a small room with a lot of reflective surfaces — bookshelves and soft furniture help.
- Handling noise: If you're using a lavalier, rub the clothing around the attachment point and listen for fabric noise. Reposition if needed.
Baylor's oral history specialists consistently emphasize preparation as foundational — this extends directly to knowing your equipment works before you're sitting across from your grandmother trying to manage a conversation, a microphone, and your nerves simultaneously.
Do a final check immediately before the interview: press record, say the date and who is being interviewed, and confirm the recording has started and the level meters are moving. This opening identification serves double duty as both an audio check and a metadata record. ("Today is March 14th, 2025. I'm speaking with my grandmother, Elena Petrescu, at her home in Cleveland, Ohio. My name is Daniela Petrescu and I'll be conducting the interview.")
Then: breathe, look at the person across from you, and begin.
A Final Word on Gear Perspective
The oral historian and professor Doug Boyd, director of the Louis B. Nunn Center for Oral History at the University of Kentucky, has spent his career helping people understand the relationship between equipment and practice. His essential insight: technology matters, but it's in service of something more important than itself.
The most technically perfect recording of a conversation where the narrator felt hurried, uncomfortable, or unheard is less valuable than a recording that's slightly noisy but captures someone who felt safe enough to tell the whole truth. Gear is the container. The story is what matters.
What the right gear does is remove friction — it lets you be present in the conversation instead of anxious about whether you're capturing it. It gives you confidence. It produces a recording you'll be proud to share and that will survive the decades ahead. That's what we're optimizing for.
So pick the tier you can afford, add an external microphone if you possibly can, test it before the day, record on two devices, and go have the conversation. The clock is ticking, but you're ready.
Only visible to you
Sign in to take notes.