How to Share Family Oral History Recordings
Sharing the Story: How to Give These Recordings a Life Beyond the Hard Drive
You've built a preservation system. The files are secure. The backups are in place. The migration plan is documented. Now comes the question that makes preservation meaningful: What happens next?
All the technical work of the previous section — the careful storage, the redundancy, the long-term planning — exists for one reason: so these recordings can be heard. Not locked away in perpetuity, but alive and accessible to the people they matter to. This section is about deciding who gets to hear these stories, how they'll hear them, and what form that sharing takes. It's where preservation transforms from archival practice into something deeply human.
For many people, this is where the project quietly stalls. The recordings sit on a hard drive for months, then years. Nobody listens to them. The narrator — the person who poured their memories into that microphone — never hears the final result. The cousins who were supposed to receive a copy never do. This isn't a moral failing. It's a logistics problem. You've done the hardest part — the asking, the listening, the recording. The sharing part just needs a plan. And the good news is that there's no single right way to share an oral history.
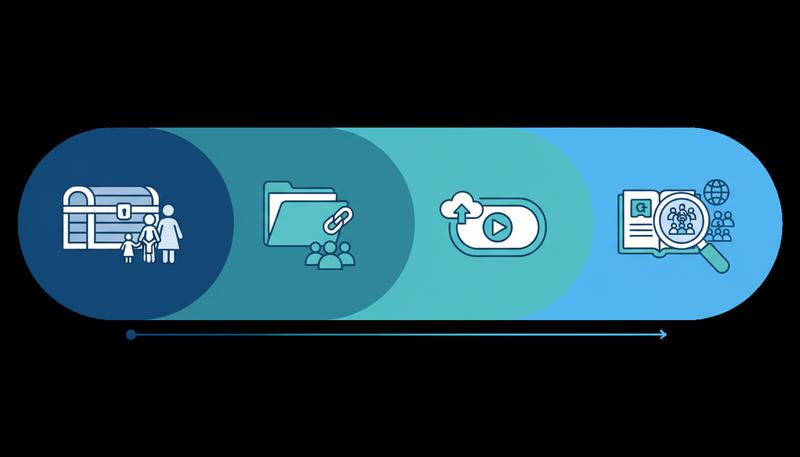
Understanding Your Sharing Options: A Spectrum
Before you decide how to share, it helps to know what's actually possible. Your recordings don't have to be all-or-nothing — either completely private or completely public. There's a spectrum.
Private access means only you have the files. You're the sole keeper. This is fine for sensitive material, but it does mean that when something happens to you, the recordings could be lost.
Family-only access means people you've chosen — your immediate family, maybe a few trusted extended relatives — can listen. They have a link or a folder, but they're not posting it on social media. Think of it as "passing around" in the digital age.
Semi-private access describes material that exists somewhere discoverable by anyone who has the link, but remains invisible to the wider internet. You'd know it exists; a stranger doing a Google search wouldn't find it. Unlisted YouTube videos and password-protected shared folders live here.
Public or archival access means the recording is intentionally made available to researchers, historians, or the general public — either through a public repository, an accessible website, or open distribution platforms.
If you didn't think through this at the start of your project, now is a good moment to revisit the conversation with your narrator. Show them the recording. Let them decide what feels right. Most people, when they hear themselves tell their own story, become more open to it being heard — but that has to be their choice, not yours.
Start Simple: A Private Family Link Is a Complete Project
Let's get this out of the way: creating a private shared folder with your family members and uploading your recordings there is a finished project. It counts. Don't let the perfect be the enemy of the shared.
A well-organized Google Drive or Dropbox folder, accessible to twenty family members, is a more meaningful outcome than a brilliantly produced documentary that never quite gets finished. I have seen — and you have probably seen — incredible interview recordings go nowhere because the person who made them was waiting until they had time to edit them properly. Meanwhile, the narrator's health declined. The moment for celebration passed. The files sat.
Here's a practical setup that takes about an hour:
Create a dedicated folder in Google Drive, Dropbox, or iCloud. Name it something specific: "Grandma Rose's Oral History — 2024" or "Kowalski Family Interviews." Not "Misc Family Stuff." Specific names get opened. Vague names get ignored.
Organize by narrator and date, not by file type. Keep the audio file, the transcript, any photos you scanned, and your interview notes together in one sub-folder per interview. When someone opens that folder years from now, everything they need will be in one place.
Add a README file — just a plain text document or Word doc at the top level — that explains what's in the folder, who conducted the interviews, when they were done, and any relevant context. This is the difference between a box of unlabeled tapes in an attic and an actual archive.
Set the sharing settings carefully. "Anyone with the link can view" is fine for most families. If your family has complicated dynamics or if some content is sensitive, you might want to limit access to specific email addresses.
Send the link with context. Don't just paste a URL into a family group chat. Write a short message explaining what's in there, who to contact with questions, and — this matters — tell people what you found most moving about the interview. Give them a reason to click.
The Smithsonian's Folklife and Oral History Interviewing Guide emphasizes that stories and traditions are most powerful when they're shared within the communities they come from — "they anchor us in a larger whole, connecting us to the past, grounding us firmly in the present." A family Dropbox folder isn't glamorous, but it's a real act of connection.
YouTube and Vimeo as Distribution Platforms
If you recorded video, you have an option that many families overlook: uploading to YouTube or Vimeo as an unlisted video.
"Unlisted" is the key word here. An unlisted YouTube video does not appear in search results, does not show up on your channel's public page, and cannot be found by strangers. It exists at a private URL that only people you share it with can access. For family oral histories, this is an elegant solution: the video is accessible from any device with a web browser, it streams reliably without anyone needing to download a large file, and the link works forever (assuming the platform does — more on that in Section 10's notes on preservation).
On YouTube:
- Upload your video from the Creator Studio.
- Under "Visibility," select "Unlisted."
- Copy the link and share it with your family.
- Consider adding time stamps in the description (00:00 – Introduction, 04:23 – Grandmother talks about arriving in New York, 18:45 – The story of the bakery) so family members can navigate to the parts that matter most to them.
On Vimeo: Vimeo offers even more granular privacy controls, including password protection, domain-level restrictions, and the ability to allow or block downloading. Their free tier has storage limits, but their paid plans are reasonably priced and often preferred by people who are more serious about the presentation of their videos.
One practical note: YouTube does automatic captioning, which is imperfect but surprisingly useful. If you haven't already created a full transcript, YouTube's auto-generated captions can serve as a rough first draft — something family members can read while watching, and something that makes the content accessible to family members who are hearing impaired.
The Highlights Reel: Editing for Family Gatherings
There's something you should know about family gatherings and oral history footage: people will watch a well-edited five-minute highlights reel with rapt attention. They will not watch a ninety-minute unedited interview, even if it's the most interesting thing ever recorded.
This is not a judgment on your family. This is human nature. Context matters, and attention spans are real.
Creating a short "highlights" edit of your longer interview is one of the highest-leverage things you can do with your recordings. A ten-minute video that captures three or four of the most compelling moments — the funniest story, the most moving memory, the surprising historical detail — gives casual family members an entry point. It makes the material feel accessible rather than like homework.
You don't need professional editing skills to do this. iMovie (free on Mac and iPhone), DaVinci Resolve (free, professional-grade), and CapCut (free, phone-based) are all perfectly capable of cutting a highlights reel. The basic process:
graph TD
    A[Re-watch or re-listen to full interview] --> B[Note timestamps of strongest moments]
    B --> C[Import footage into editing software]
    C --> D[Cut to just the highlighted segments]
    D --> E[Add simple title cards with context]
    E --> F[Add narrator's name and dates at start]
    F --> G[Export and share]
The most important thing isn't the editing — it's the curation. Which stories need to be heard? Which ones made you stop and replay them? Which ones do you want your children to know? Start there. Three great segments, cleanly cut with titles, will do more work than an exhaustive edit that takes weeks and never gets finished.
Showing a highlights reel at a family reunion, a birthday party, or a memorial service can transform the experience. People who didn't know this interview happened will suddenly be riveted. The narrator — if they're present — will see their family transfixed by their words. I've seen grown adults stand completely still in the middle of a noisy family party, watching a phone screen, because someone was playing three minutes of their grandmother explaining how she met their grandfather. That's the power of this format.
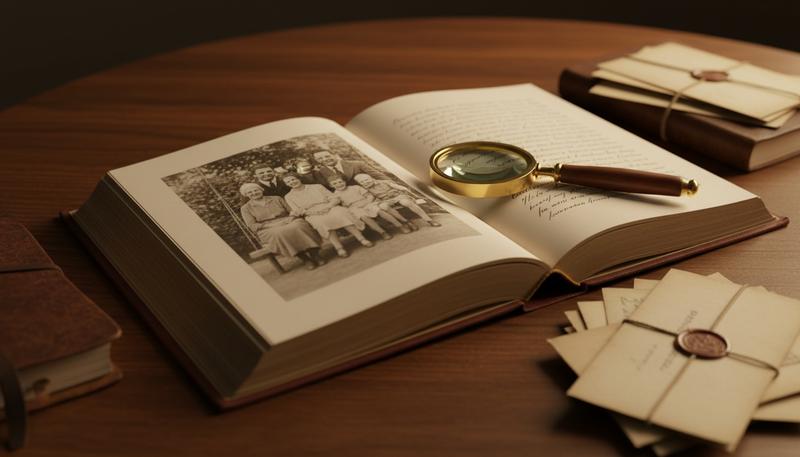
From Oral History to Written Memoir: Using Transcripts as the Foundation
If you've already transcribed your interviews (as covered in Section 9), you're sitting on the raw material for something genuinely lasting: a written family memoir.
This doesn't have to mean a 300-page book. It can mean a 15-page illustrated document. A pamphlet. A PDF with photos. A family chapbook printed at the local copy shop. The form is flexible; the thing that matters is that the narrator's voice, now converted to text, lives somewhere on a page.
The path from transcript to written memoir looks something like this:
Lightly edit for readability. Spoken language doesn't translate directly to the page. Remove the "ums" and repeated false starts. Break long monologues into paragraphs. But preserve the narrator's voice — their turns of phrase, their rhythms, their particular way of saying things. The goal is not to write about them; it's to let them speak through the page.
Add contextual headings. Group sections of the transcript under headings that help a reader navigate: "The Early Years," "Coming to America," "The War," "Building a Life." This transforms a wall of text into something that reads like a memoir.
Weave in photographs. A written memoir comes alive when paired with visual artifacts — old photographs, letters, documents, maps. The Smithsonian's folklife resources emphasize that oral history traditions are anchored in material culture and community artifacts, and the combination of word and image does something that either alone cannot.
Write short bridging passages. As the editor, you can add brief context notes — a sentence or two explaining who someone is, what was happening historically, what a place looked like — without inserting yourself into the narrator's voice.
Consider self-publishing. Services like Blurb, Lulu, and Amazon's Kindle Direct Publishing make it possible to print a small number of beautifully formatted hardcovers or paperbacks at reasonable cost. Ten copies for the immediate family. Twenty for the extended family. One for each grandchild when they turn eighteen. The physical artifact changes the relationship people have with the material — it's no longer a file, it's a book, and books get kept.
The transcript-to-memoir process can be as simple or as elaborate as you choose. But if you've put in the work of recording and transcribing, the additional step of turning it into a document is the most direct way to multiply the longevity of what you've captured. Files on drives get lost. Books on shelves get found.
Submitting to a Public Archive or Library: Why It Matters and How It Works
Here's something that surprises people: local libraries, historical societies, universities, and cultural institutions are often actively looking for oral history donations — and they're surprisingly easy to approach.
When you deposit an oral history at an institution, several things happen. The recording gets preserved according to professional archival standards (which we covered in Section 10). It becomes discoverable to researchers, journalists, genealogists, and historians who would otherwise never know it existed. And it becomes part of a larger public record — a contribution not just to your family but to the documented history of a time, place, community, or experience.
An interview with your grandmother about growing up in a Puerto Rican neighborhood in 1950s New York isn't just a family document. It's a primary source about mid-century urban migration, about a specific community's experience of a specific city at a specific moment in history. It belongs, in some sense, to anyone who wants to understand that world.
The Oral History Association's Best Practices document advises interviewers to identify an appropriate repository even before conducting their interviews — to "select a repository that aligns with the project's goals, has the capacity to preserve the oral histories, can enforce any signed agreements, and will make them accessible to the public." If you didn't do this at the start, you can still do it now.
How to find the right repository:
- Local historical societies are often the best starting point for interviews about a specific place or community. They are usually smaller, more accessible, and genuinely enthusiastic about local-history donations.
- University libraries and special collections are excellent for interviews touching on significant historical events, ethnic communities, occupational histories, or social movements. Many have formal oral history programs.
- Ethnic and cultural organizations — Polish-American heritage societies, Japanese American National Museum, immigration history centers, Veterans History Project — often specifically collect stories from particular communities.
- The Library of Congress Veterans History Project accepts oral history recordings from American veterans and their families. Their submission process is clearly documented and they accept audio and video recordings along with written materials.
The typical submission process:
- Contact the institution and describe your recordings (who, when, what's covered).
- They'll ask about consent documentation — do you have a signed release from the narrator?
- They'll provide their own deed of gift form, which specifies what rights you're transferring and any access restrictions.
- You deliver the files (usually digitally, sometimes on physical media) along with any transcripts, release forms, and descriptive notes.
- Their archivists catalog the material and make it accessible according to whatever terms were agreed.
Be honest about what you have. An 80-minute audio recording with a rough transcript and a signed consent form is a perfectly acceptable donation. You don't need a broadcast-quality production or a fully indexed finding aid. Institutions would much rather receive imperfect documentation than have a recording lost entirely.
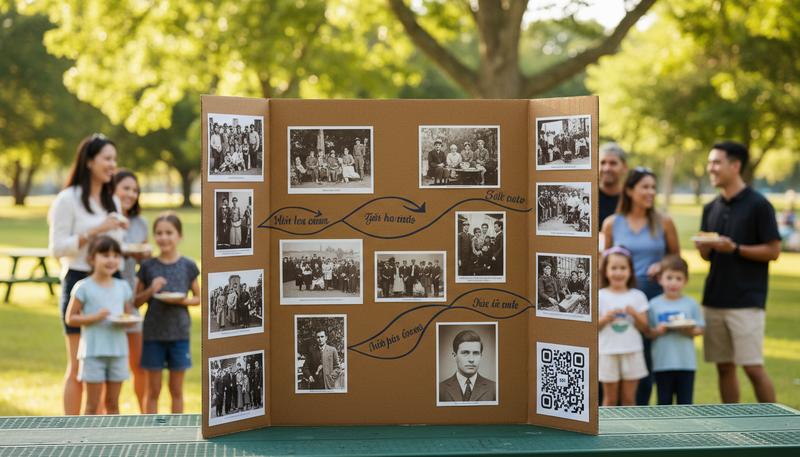
Creating an Exhibit: For Reunions, Memorials, and Celebrations
There is something genuinely powerful about displaying oral history material in a physical or digital exhibition format — at a family reunion, a memorial service, a cultural celebration, or even just a holiday gathering.
This doesn't require a museum budget or curatorial expertise. It requires good material and a little thoughtfulness about presentation.
For a physical exhibit:
A tri-fold display board with printed photographs, pulled quotes from transcripts, and a QR code linking to audio clips or video can be assembled for under $50 and creates a genuine focal point at a family event. Print the narrator's words large. Choose the most evocative image you have of them. Let the display do the work of drawing people in, and then let the QR code do the work of taking them deeper.
If you have access to a screen and projector, a slideshow that combines photographs with audio — the narrator's voice telling stories over images of the places and people they're describing — is extraordinarily moving and takes only a few hours to assemble in PowerPoint or Google Slides.
For a digital exhibit:
Services like Google Sites, Wix, or Adobe Express let you build a simple single-page website with no coding knowledge. A family oral history website might include: a brief introduction, embedded audio or video clips, a few photographs, pulled quotes, and links to the full recordings. You can share it with family members before the event, display it on a screen during the event, and leave it up indefinitely as a memorial.
If you want something more structured, some cultural institutions and digital humanities projects use free platforms like StoryMapJS or Omeka — particularly useful if the oral history touches on specific places and you want to map the narrator's journey through geography as well as time.
Sharing With Your Narrator: The Most Important Audience of All
Everything we've discussed so far — the family folders, the YouTube links, the memorial displays, the archive submissions — involves other people experiencing the oral history. But there's an audience you may have overlooked, or at least deprioritized: the person you interviewed.
Giving your narrator something tangible is one of the most meaningful things you can do with what you've created. And it's one of the things that people most often forget to do, or put off, or assume isn't that important.
It is that important.
Here's what you can give them:
A copy of their own recording. This sounds obvious, but it often doesn't happen. Burn a DVD if they have a player. Put it on a USB drive. Email them the link. Hand them a printed transcript. The narrator deserves to experience what they created — and very often, hearing themselves tell their own story is a profound experience that they carry differently than the memory itself.
A printed transcript. Even a rough transcript, printed out and put in a binder, is a gift. Many older narrators have never seen their words in print. Some keep them for years. Some share them with siblings or children. The physical document makes the story feel real in a way that a file on a computer doesn't.
A thank-you letter that includes specific moments. Not a generic "thanks for doing this." A letter that says: I want you to know that when you told the story about your father's hands and how they looked when he came home from the docks, I had to stop the recording for a moment because I was crying. That detail — those hands — is something I will carry with me forever. Tell them specifically what they gave you. That specificity is the whole gift.
The highlights video or printed memoir, as appropriate. If you've done any of the work described in this section, share the output with the narrator first, before anyone else. They should be the first to see how their story looks when it's been gathered and shaped. They should have the right to respond, correct, add, or ask you to remove something before the rest of the family sees it.
This last point matters more than it might seem. The Oral History Association emphasizes that best practice includes "providing the narrator an opportunity to approve the oral history prior to public release." Sharing a finished product — even a family-only product — before it goes out is both an ethical obligation and a deeply relational act. It says: this is yours, and you have the final word.
The Ongoing Project: Oral History as a Family Practice
Here's the thing about oral history that nobody tells you when you start: once you've done it once, you never see your family the same way again.
You start noticing things. The way your aunt pauses before she talks about her first job. The careful way your father changes the subject when certain topics come up. The stories your cousins tell at Christmas that you've never thought to record. The way your neighbor — who isn't even related to you — can describe what this neighborhood looked like in 1971 in ways that make you wish you had a microphone.
A single interview is a completed project. A sustained family oral history practice is something else — it's a way of being in the world, a habit of attention and documentation that can span years and eventually become one of the most significant things you've ever built.
A few approaches to keeping this going:
The annual check-in. Commit to conducting at least one interview per year with someone in your extended family or community. It doesn't have to be formal or long. An hour with a phone recorder and two or three good questions, shared in the family folder — that's a year's contribution.
Recruit the next generation. Teenagers and young adults often make extraordinary interviewers when given the tools and a little encouragement. They ask questions that older interviewers might not think to ask. They have relationships with elders that produce different kinds of stories. Teaching a young cousin or a niece or nephew to conduct interviews is one of the most lasting investments you can make.
Build around existing events. Family reunions, holiday gatherings, and milestone birthdays are natural settings for oral history. A 90th birthday is a perfect occasion for a recorded conversation. A family reunion is a perfect occasion for a shared display and a follow-up interview with whoever most surprised you at the last one.
Keep the archive alive. Add to it. Link new interviews to old ones. Note when narrators pass away, and note what they left behind. Observe in writing when something in a recording turns out to be historically significant — when an election your grandfather mentioned ends up being pivotal, when a place your grandmother described appears in the news. The archive grows richer over time, but only if someone is paying attention.
The Smithsonian Folklife Guide describes oral history narrators as "living links in the historical chain" — and that's exactly right. Every link eventually breaks. But you have the capacity to capture what each link holds before it does. That's not a metaphor. That's a literal description of what you're doing when you press record.
graph LR
    A[First Interview] --> B[Share With Family]
    B --> C[Give Narrator a Copy]
    C --> D[Add to Family Archive]
    D --> E[Second Interview — Next Year]
    E --> F[Highlights for Reunion]
    F --> G[Consider Archive Deposit]
    G --> H[Recruit Next Generation]
    H --> E
A Final Word: You Already Have Everything You Need
Somewhere in the material you've gathered — in the recordings, the transcripts, the notes you took after the interview ended — there is a sentence your narrator said that you've been thinking about ever since. A story you've already told other people. An image that's become part of how you understand your family, your history, yourself.
That's the proof that what you did was worth doing.
The sharing part — the editing, the folders, the archive donation, the printed memoir — that's not the point. Those are the vehicles. The point is the sentence. The story. The understanding.
Share it anyway. The vehicles matter, not because they're glamorous but because they're how the sentence survives. Every format we've discussed in this section is just a different answer to the same question: how do we make sure this doesn't disappear?
The work you've done is irreplaceable. These recordings, imperfect as they are, capture something that has never been captured before and never can be again — a specific human being, at a specific moment in their life, remembering their life in their own voice. The Oral History Association identifies access as one of the four key elements of oral history for a reason. Preservation without access is a sealed vault. Access is how the work comes alive.
So put it somewhere people can find it. Give your narrator a copy. Show it at the next family gathering. Send the link. Tell people what's in it and why it matters to you.
The clock has been ticking the whole time you've been reading this course. But you started. You asked. You recorded. You preserved. And now you can share.
That's everything. That's the whole thing.
Only visible to you
Sign in to take notes.