How to Preserve Digital Recordings Long Term
Keeping It Safe Forever: Preservation and Long-Term Digital Archiving
You've finished the hard part: the field notes are written, the metadata documented, the first backup made, the thematic index roughed out. You've created a map for your treasure. Now comes the part that most people skip — and it's the part that determines whether all of that work, and the recording itself, actually survives.
Here's a number that should genuinely concern you: the average consumer hard drive lasts three to five years. USB flash drives can fail in as little as two. The cloud storage service you're relying on might not exist in twenty years, or it might pivot completely, or you might simply forget to renew that subscription. And yet we store irreplaceable recordings — along with all the documentation you've carefully created — on exactly these kinds of fragile, temporary systems, and we promise ourselves we'll figure it out later. That "later" is how family history disappears.
This section is about building a preservation system that actually lasts. Not a perfect system requiring expensive equipment and archival expertise, but one that's genuinely durable — something that works for real people with real budgets and real lives. We'll translate what professional archivists have learned into decisions you can make this weekend.
Think about it this way: the vinyl record was replaced by the cassette, which was replaced by the CD, which was replaced by digital downloads. Whatever storage medium you're using today will almost certainly be obsolete within twenty years. This isn't alarmism. It's the operational reality that professional archivists live with every day. The good news is that once you understand it, you can plan for it — and planning doesn't have to be complicated.
The LOCKSS Principle: Your North Star
Back in the mid-1990s, a group of Stanford librarians developed a framework for digital preservation that's still foundational today. The acronym is LOCKSS, and the logic is almost brutally simple: Lots of Copies Keeps Stuff Safe.
The insight here is this: no single storage location is reliable. But if you have copies in five different places, the probability that all five fail simultaneously approaches zero. You don't need perfect media — you need redundant media. A professional archive protects against any single point of failure, and you can apply the same logic at your kitchen table.
The LOCKSS program at Stanford University Libraries was designed to help libraries preserve digital content by distributing it across multiple institutional nodes. But the insight applies to a grandmother's stories as surely as it applies to academic journals. More copies, in more places, is the single most powerful thing you can do for long-term survival.
What this means practically: your recording should never live in only one place. Not just "backed up once" — truly distributed, in different physical locations, across different types of storage, with at least one copy that updates automatically.
Archival File Formats: Why the Container Matters
Before we talk about where to store your files, we need to talk about what kind of files you're actually storing. This is one of those decisions that seems technical but has real consequences.
Audio: WAV Over Everything
If you recorded on a modern digital recorder, you probably had a choice between WAV and MP3. If you picked MP3 for the smaller file size, you made a completely reasonable decision — and introduced a preservation problem you should fix now.
Here's what's happening technically: WAV (Waveform Audio File Format) is uncompressed. It stores the audio signal at full fidelity, without discarding any data. MP3 is lossy compressed — when your recorder creates an MP3, it's making irreversible decisions about which parts of the audio signal to throw away, based on models of what human ears supposedly care about.
For casual listening, this tradeoff is fine. For archival purposes, it creates two serious problems. First, you've permanently lost audio data from the original recording — you can never get it back. Second, every time you edit or re-encode an MP3, you lose more quality. The file degrades with each generation of processing, like a photocopy of a photocopy.
The National Park Service's oral history guidelines are explicit: "Recordings created in highly compressed formats such as .mp3 are not as stable as those created as .wav files." The recommended standard is 24-bit / 96 kHz / Stereo / WAV. Yes, the files are larger — a one-hour WAV at archival quality runs about 2GB compared to 100MB for an equivalent MP3. But storage is cheap. Your grandmother's voice is not.
If you've already recorded in MP3, don't panic. Convert those files to WAV now, and treat the WAV versions as your archival masters going forward. You won't recover the lost audio data, but you'll stop the degradation cycle. Keep the MP3s too — they're useful for sharing — but build your preservation strategy around the WAVs.
Here's the professional approach: create a "preservation master" in WAV, and a separate "access copy" in MP3 for family members to listen to, share, or download. This two-tier system is standard practice in professional archives.
Video: A More Complex Landscape
Video preservation is harder. The files are enormous, the format landscape is chaotic, and the right answer depends on what camera you used.
The general principle is the same: preserve in the least-compressed format available to you. If your camera records in a raw or minimally compressed format, use it. Common archival-friendly video formats include:
- MOV (Apple's QuickTime format, widely supported)
- MXF (Material Exchange Format, used by broadcasters and archives)
- MP4 with H.264 or H.265 codec — not truly archival, but widely compatible and a practical compromise for family historians
Avoid highly proprietary formats that might become unreadable as software changes. If your camera saves in some manufacturer-specific format, convert to MOV or MP4 as soon as you can.
One practical reality: video files are big. A single hour of decent-quality video can run 10-50GB. That means higher storage costs, longer backup times, and fewer cloud storage options. Some families keep video as an archival master and create compressed MP4 copies for distribution. That's a smart approach.
graph TD
    A[Original Recording] --> B{Format?}
    B -->|WAV or Lossless| C[Archival Master ✓]
    B -->|MP3 or Compressed| D[Convert to WAV]
    D --> C
    C --> E[Create Access Copy MP3/MP4]
    C --> F[Store Master in 3-2-1 System]
    E --> G[Share with Family]
The 3-2-1 Backup Rule Applied to Oral History
If LOCKSS is your philosophy, the 3-2-1 rule is your implementation plan. It's used by IT professionals, photographers, and archivists worldwide, and it translates perfectly to family oral history.
3 — Keep at least 3 copies of every file 2 — Store them on at least 2 different types of media 1 — Keep at least 1 copy offsite (geographically separate from the others)
Let's make this concrete. Here's what 3-2-1 looks like:
Copy 1: Your primary working copy — the files on your laptop or desktop, organized in a logical folder structure. This is where you do your work — listening back, editing, transcribing.
Copy 2: A local external hard drive — plugged into your computer (or nearby) and backed up regularly, either automatically or on a schedule you stick to. This protects you if your primary computer fails.
Copy 3: An offsite backup — this is the one people most often skip, and it's the most important for catastrophic scenarios like fire, flood, or theft. Cloud storage serves this role perfectly for most people.
The "two different types of media" requirement protects you from a common mistake: keeping your only two copies both on external hard drives in your office. If there's a fire or a power surge, both could be lost simultaneously. Cloud plus hard drive satisfies this requirement elegantly.
graph LR
    A[Master WAV Files] --> B[Copy 1: Laptop/Desktop]
    A --> C[Copy 2: External Hard Drive]
    A --> D[Copy 3: Cloud Storage - Offsite]
    B -->|Same physical location| E[Protected against single drive failure]
    C -->|Same physical location| E
    D -->|Different location| F[Protected against local disaster]
Cloud Storage: What to Use, What to Avoid
Cloud storage has transformed backup — but it comes with real limitations that matter for long-term preservation.
What Cloud Storage Does Well
It handles the "offsite" requirement automatically. Once your files are uploaded, they're geographically separated from your home. Most major cloud services also maintain internal redundancy — your files are actually stored across multiple data centers simultaneously. And for access and sharing with family members, cloud storage is genuinely unbeatable.
The Honest Limitations
Cloud services are businesses. They can change their pricing. They can shut down. They can be acquired. They can change their terms of service. And most importantly, they require ongoing subscription payments — if you stop paying, you may lose access to your files.
The Digital Preservation Coalition recommends against relying on any single vendor for long-term preservation — including cloud vendors. Your cloud copy is one redundant copy in your system, not your only strategy.
Specific Recommendations
For most family oral historians, a combination of these services works well:
-
Backblaze Personal Backup (~$9/month): Unlimited storage, automatically backs up your entire computer, runs quietly in the background. Among archivists and photographers, Backblaze has a genuinely strong reputation for reliability and simplicity. This is the easiest "set it and forget it" offsite backup.
-
Google Drive, Microsoft OneDrive, or iCloud: Fine for access copies and sharing, but be cautious about relying on these for archival masters. Storage limits are lower, and these services are optimized for productivity rather than preservation.
-
Amazon S3 or Backblaze B2 (for those comfortable with technical setup): These are object storage services used by institutions and businesses. They're inexpensive per gigabyte, reliable, and genuinely durable — but require more setup. If your project is large or you're thinking seriously about longevity, B2 in particular is inexpensive and well-regarded.
What to avoid: relying solely on a social media platform as your preservation strategy. Facebook, YouTube, Vimeo — these platforms can delete content, change policies, compress your files, or simply shut down. They're distribution channels, not archives.
The cost question is real. Using Backblaze ($9/month) plus a one-time external drive purchase ($60-100 for a 2TB drive) runs roughly $100-200 in year one. For most families, that's a reasonable investment for what amounts to a primary historical document of your family's life. If cost is genuinely a barrier, a single external hard drive plus a free tier of cloud storage is dramatically better than nothing.
External Hard Drives and Physical Media: The Real Story
External hard drives are convenient and relatively cheap, but they fail — and they fail more often than you'd think from reading the marketing materials.
Backblaze, which operates tens of thousands of drives in their data centers, publishes annual hard drive reliability reports that are among the most honest assessments available. Their data consistently shows failure rates increasing sharply after three to four years of use. Some drives fail in year one.
This doesn't mean drives are useless — it means they require active management. Here's a practical approach:
Replace your external drives every 3-5 years. Don't wait for failure. When you buy a new drive, copy everything from the old one, verify the copy worked, and retire the old drive (or keep it as an additional redundant copy while the data is still readable).
Use spinning hard drives for bulk storage, SSDs for portability. Traditional spinning hard drives (HDDs) are cheaper per gigabyte and well-understood. SSDs (solid-state drives) are faster and more physically resilient to drops and vibration, but they can lose data if stored without power for extended periods — not ideal for a drive you're going to put in a drawer for five years. For your working backup drive, either works. For a drive you're storing away, traditional HDDs are actually preferable.
Store drives properly. Keep them away from extreme heat, humidity, and physical shock. A hard drive case or padded sleeve is worth having.
What about optical media (CDs, DVDs, Blu-rays)? A decade ago, "burning a DVD" was standard preservation advice. Today it's more complicated. The "archival grade" optical media from manufacturers like Verbatim or MAM-A can theoretically last decades in ideal conditions, but consumer-grade blank discs often fail in five years or less. And optical drives are increasingly rare in modern computers. For a long-term strategy, optical media is a supplement at best. Don't rely on it as a primary storage medium.
What about magnetic tape? LTO (Linear Tape-Open) magnetic tape is actually the gold standard for long-term archival storage in institutional settings — it's what major archives use for cold storage of their most important materials. But the hardware costs thousands of dollars and requires significant technical knowledge. Unless you're running an institution, it's not practical for a family project.
Metadata: The Gift You Give Your Future Self
Metadata is the information about your files — who was recorded, when, where, what topics were covered, who conducted the interview. It's what allows a recording to be found, understood, and used by someone who wasn't in the room.
Getting metadata right is also one of the things most family oral historians handle worst. I've encountered stories of descendants discovering boxes of old cassettes labeled only with a date, or not labeled at all. They could hear a voice but couldn't identify who it was. A recording without metadata is like a book without a title page.
The Oral History Association's best practices emphasize that oral history projects should include documentation alongside the recordings themselves. For family projects, this doesn't need to be elaborate — but it does need to be consistent and thorough.
A Simple Metadata Standard for Family Oral History
File naming is your first line of defense. A consistent naming convention applied at the moment of recording saves enormous headaches later. Here's a format that works:
YYYY-MM-DD_NarratorLastName-FirstName_InterviewerLastName_Topic.wav
For example:
2024-03-15_Kowalski-Helena_Kowalski-David_immigration-poland.wav
This format sorts chronologically, identifies the narrator and interviewer immediately, and gives a topic cue — all without opening the file. Apply this naming convention to every file, including transcripts, photographs taken during the interview, and consent forms.
A separate metadata document for each interview should contain:
- Narrator: Full name, date of birth (if known), relationship to interviewer
- Interviewer: Full name
- Date of interview: Day, month, year
- Location: City, state/country; type of location (narrator's home, etc.)
- Duration: Length of the recording in hours and minutes
- Recording equipment: Device used, settings
- File format: WAV, MP3, etc.
- Topics covered: A brief list of subjects discussed (immigration, specific decade, family members mentioned)
- Summary: A one-paragraph description of the main content
- Condition notes: Any audio quality issues, interruptions, or technical problems
- Access restrictions: Any content the narrator requested not be shared publicly
- Rights: Who holds copyright (typically a shared agreement between narrator and interviewer)
Store this document as a plain text file (.txt) or PDF alongside the audio file in the same folder. Plain text is particularly useful for long-term storage because it can be opened by virtually any computer, past, present, or future, without specialized software.
Embed metadata in the file itself where possible. WAV files support metadata tags (called ID3 tags or BWF metadata) that travel with the file. Free tools like Audacity let you add these tags. Even if the external document gets separated from the file somehow, the embedded data remains.
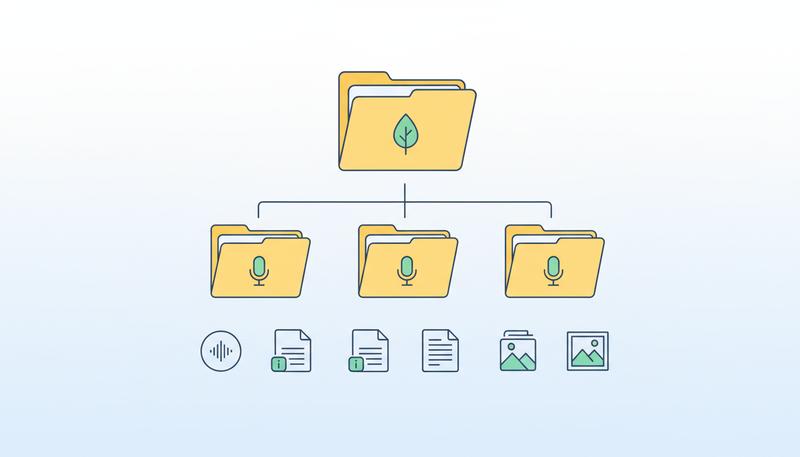
Folder Organization: A System That Scales
While we're talking about metadata, let's address folder organization — because a beautiful archival file naming system is worthless if your files are scattered across your desktop and Downloads folder.
Here's a folder structure that works well:
Family_Oral_History_Project/
├── 01_Recordings/
│   ├── 2024-03-15_Kowalski-Helena/
│   │   ├── 2024-03-15_Kowalski-Helena_master.wav
│   │   ├── 2024-03-15_Kowalski-Helena_access-copy.mp3
│   │   ├── 2024-03-15_Kowalski-Helena_metadata.txt
│   │   └── 2024-03-15_Kowalski-Helena_transcript.pdf
├── 02_Consent_Forms/
│   └── 2024-03-15_Kowalski-Helena_consent-form.pdf
├── 03_Research_Notes/
├── 04_Photographs/
└── 05_Project_Documentation/
    └── preservation-plan.txt
This structure keeps everything related to a single interview together, makes the project navigable at a glance, and replicates cleanly to any backup system. When you run your weekly backup, you're backing up this whole folder, and you know everything important is inside it.
Partnering with an Institution: When Your Archive Belongs Somewhere Bigger
Here's a possibility worth considering seriously: your family's recordings might have a natural home in a professional archive that will care for them in perpetuity.
Public libraries, historical societies, university archives, ethnic heritage organizations, and regional history centers actively collect oral history recordings from exactly the kinds of people you've been interviewing. They have climate-controlled storage, professional archivists, preservation budgets, and institutional continuity that no individual family can match. And they make these recordings available to future researchers — historians, genealogists, journalists, documentarians — who may find value in your grandmother's stories in ways you can't anticipate.
The Oral History Association recommends that oral historians "locate an appropriate repository to house the project's finished oral histories and other documentation" during the initial planning phase — not as an afterthought. For family projects, this step often gets skipped, but it shouldn't.
When Does a Family Recording Qualify for Donation?
The short answer: more often than you think. Archivists are interested in recordings that document:
- Immigration and migration experiences — nearly every regional archive is actively collecting these stories
- Labor history — working lives in specific industries, companies, or occupations
- Military service — veterans' oral histories are collected by countless institutions including the Veterans History Project at the Library of Congress
- Community and neighborhood history — especially in communities facing displacement or rapid change
- Ethnic and cultural heritage — many universities have dedicated collections for specific communities
- Historical events — interviews touching on major historical moments: civil rights, WWII, the Depression, etc.
Even if your narrator was an "ordinary person" — a factory worker, a homemaker, a farmer — professional archivists understand that ordinary lives are exactly what history is made of, and they're often the voices least represented in existing collections.
How to Approach an Institution
Contact the special collections department of your nearest university library, or your local historical society or public library. Explain that you've conducted oral history interviews with family members, describe the subject matter, and ask if they accept donations of oral history recordings.
Before you donate, make sure you have:
- Signed consent forms that grant permission for public archiving and access
- Clear rights agreements — who holds the copyright to the recording
- Metadata for each interview (this is why building good metadata habits now matters so much)
- High-quality master files in an archival format like WAV
Many institutions will accept recordings with restricted access — meaning the recording is preserved in their collection but access is limited for a period of time, or certain content is restricted to researchers with permission. This can be a good option if your narrator shared sensitive material they're comfortable having preserved but not immediately public.
Be aware that donation is permanent. Once you donate materials to an institution, they become part of that collection. Keep your own copies — you're not giving away your family's access to these stories, you're creating an additional custodian.
The Veterans History Project: A Special Case
If you've interviewed veterans of any U.S. military conflict, the Veterans History Project at the Library of Congress is one of the best donation options available. They accept audio and video recordings, provide detailed submission guidelines, and your recordings become part of the American Folklife Center's collection at the Library of Congress — one of the most permanent archives in the country. This is a genuinely wonderful option for preserving military service stories.
Your Preservation Plan: Something You'll Actually Follow
The difference between a preservation plan that works and one that doesn't is whether it exists in the first place, and whether it's simple enough to maintain without heroic effort.
Here is a minimal, durable preservation plan for a family oral historian. It's designed to be achievable even if you're not particularly technical, even if your budget is limited, and even if you're going to be busy for the next six months:
Step 1: Establish Your Master Files (Do This Once)
- Identify all your recordings and consolidate them in one location
- Rename all files using a consistent convention (date_narrator_topic.wav)
- Convert any MP3 masters to WAV (you can use Audacity, which is free)
- Create a metadata document for each interview
- Organize everything in the folder structure described above
Step 2: Implement 3-2-1 (Do This This Week)
- Purchase an external hard drive (2TB costs about $60-80)
- Copy your complete project folder to the external drive
- Sign up for Backblaze Personal Backup ($9/month) or enable iCloud/Google Drive auto-backup and verify your project folder is being backed up
- Confirm you have copies in at least two physical locations
Step 3: Schedule a Checkup (Do This Annually)
Set a recurring calendar reminder — the same date every year, perhaps on a family member's birthday or a meaningful anniversary — to:
- Open several random audio files and confirm they play correctly
- Check that your cloud backup is current
- Verify your external drive is functioning (drives can fail silently)
- Check whether any format migration is needed
- Add any new recordings to the system
This checkup takes about 30 minutes per year. That's the maintenance cost of a preservation system that will last a generation.
Step 4: Document the System Itself
Write a simple text file called preservation-plan.txt and store it in your project folder. It should explain:
- What's in this archive and why it matters
- Where all the copies are kept (including account names for cloud services, with password stored separately in a password manager)
- Who to contact if something needs attention
- Instructions for doing the annual checkup
This document is for the person who inherits this project from you — a family member who may need to take over stewardship of these recordings someday. Don't make them figure it out. Leave a map.

A Note on Migration: The Long Game
One thing professional archivists know that most family historians don't think about: the formats and storage media we use today will eventually become obsolete. Not might — will. The only question is when.
The WAV format has been around since 1991 and shows no signs of going anywhere, but no one can promise it will be readable in 50 years. Your current external hard drives will be physically unreadable within a generation or two — not because the data is gone, but because the hardware to read them won't exist (remember trying to find a floppy drive in 2010?).
This is not a reason to despair. It's a reason to think of preservation as a practice rather than a destination. Every five to ten years, plan to migrate your archive:
- Copy everything to new drives
- Assess whether your formats are still current best practice
- Update your metadata documentation
- Re-evaluate your cloud storage providers
This migration cycle is exactly what professional archives do, and it's why they're able to preserve materials across centuries. You don't have to do it every year — but knowing it's part of the job means you won't be caught off guard when the moment comes.
The recordings you've made represent something that cannot be recreated once it's gone. A voice, a memory, a specific turn of phrase, the way your grandmother laughed before answering a difficult question — these are unrepeatable. The technical work of preservation can feel unglamorous compared to the human moment of the interview itself. But it is, in its own way, an act of love. You're telling these recordings — and the people who gave them to you — that their survival matters enough to plan for.
Build the system. Set the reminder. Trust that future members of your family will be grateful beyond measure.
Only visible to you
Sign in to take notes.